Preparation
Download and execute the setup script
You will need to download and deploy the CloudFormation template with a script to set up the resource of this workshop in your own AWS account.
- Make a directory named “waf-workshop” and change your working directory to this directory.
- Execute the code below (you can run each command or run all commands at one time):
# Download workshop assets
curl 'https://static.us-east-1.prod.workshops.aws/public/9bf792a6-2354-4106-9e62-7e75544c4ccc/assets/automated-scanner.zip'      --output automated-scanner.zip
curl 'https://static.us-east-1.prod.workshops.aws/public/9bf792a6-2354-4106-9e62-7e75544c4ccc/assets/manual-scanner.zip'         --output manual-scanner.zip
curl 'https://static.us-east-1.prod.workshops.aws/public/9bf792a6-2354-4106-9e62-7e75544c4ccc/assets/rate-limit-trigger.zip'     --output rate-limit-trigger.zip
curl 'https://static.us-east-1.prod.workshops.aws/public/9bf792a6-2354-4106-9e62-7e75544c4ccc/assets/sample-static-website.html' --output sample-static-website.html
curl 'https://static.us-east-1.prod.workshops.aws/public/9bf792a6-2354-4106-9e62-7e75544c4ccc/assets/scanning-dashboard.html'    --output scanning-dashboard.html

# Download CloudFormation template and the setup script
curl 'https://static.us-east-1.prod.workshops.aws/public/9bf792a6-2354-4106-9e62-7e75544c4ccc/static/waf-workshop.yaml' --output waf-workshop.yaml
curl 'https://static.us-east-1.prod.workshops.aws/public/9bf792a6-2354-4106-9e62-7e75544c4ccc/static/deploy-workshop-own-account.sh' --output deploy-workshop-own-account.sh
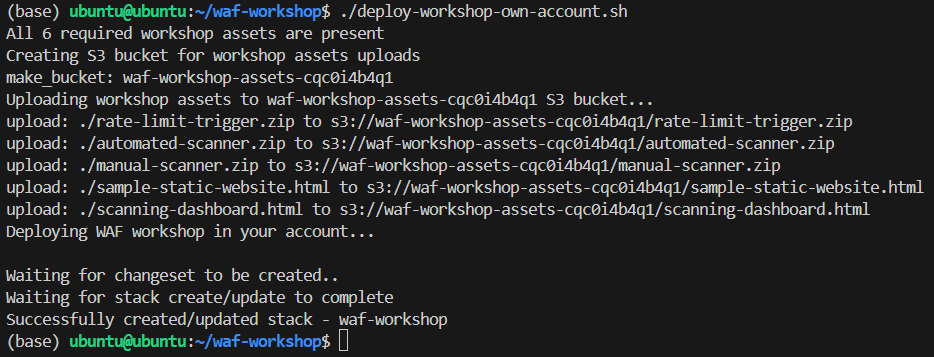
 3. Execute the bootstrap script
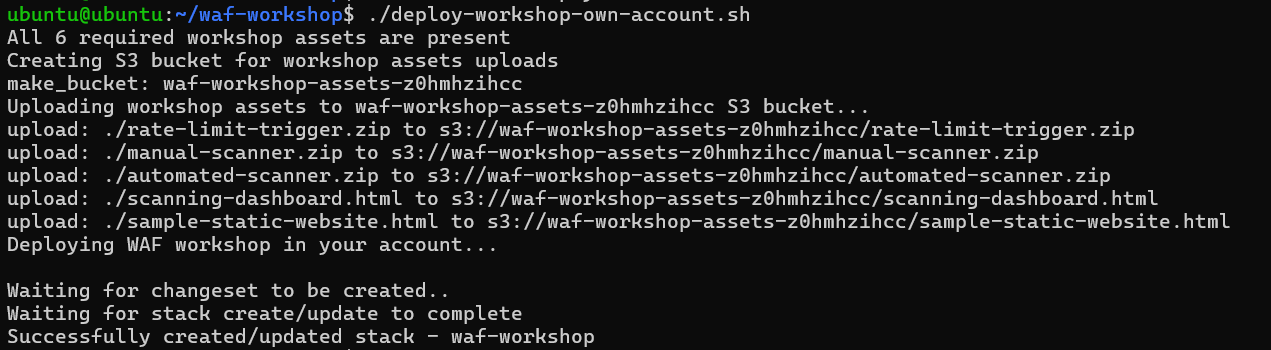
sh deploy-workshop-own-account.sh
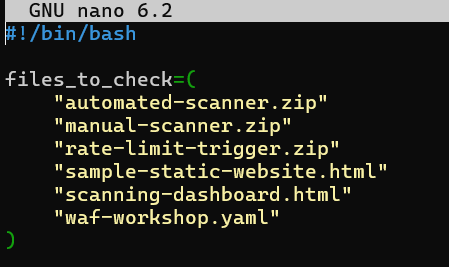
If you meet the error “syntax error: “(” unexpected”, while running the script
 Pleaze edit the first line of the script from “#!/bin/bash” to “#!/bin/bash” and save it.
 and run the script with following command
 ./deploy-workshop-own-account.sh
If you receive the notification “Failed to create/update the stack.” then use the command aws cloudformation describe-stack-events --stack-name waf-workshop or check the Stack page in CloudFormation console to troubleshoot:

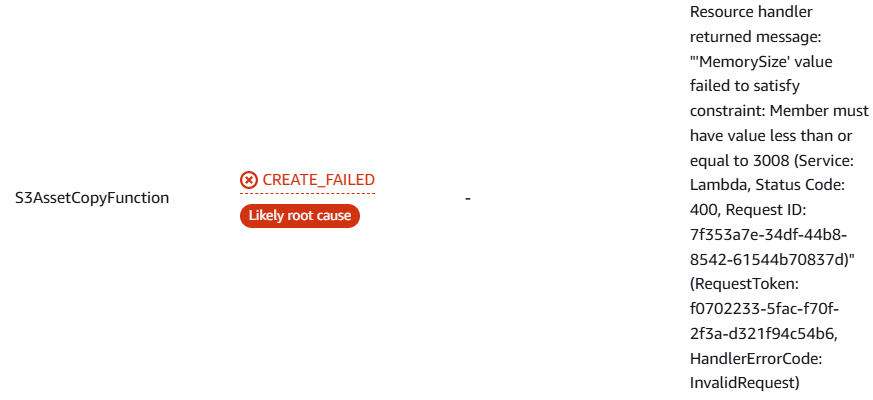 you will see that you have to adjust the MemorySize in the yaml file down to 3008.
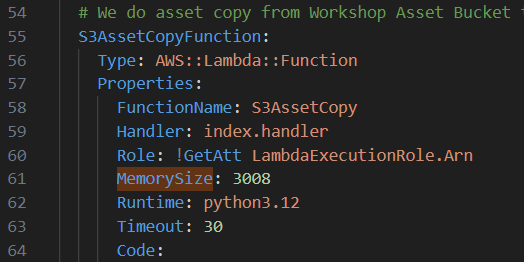 After editting the yaml stack, run the script again. You will wait for 15 minutes then the task is deployed successfully.
Please remember to delete all deployed resources (CloudFormation stack) after completing the workshop to avoid unnecessary charges.
Assessment
In this workshop, the deployed web application is built in purpose to contain web vulnerabilities. You would be guided to assess and enhance the security posture of a web application. The goal is to find the existing vulnerabilities and deploy countermeasures.
Following are the main steps in this section:
Architecture overview: Take a look at the architecture and understand its workflow and the functions of the underlying services.
Progress dashboard tracking: Track your progress and investigate the reports from automated web app vulnerability scan.
Manual scan execution: Implement web app scan manually to find the existing vulnerabilities.
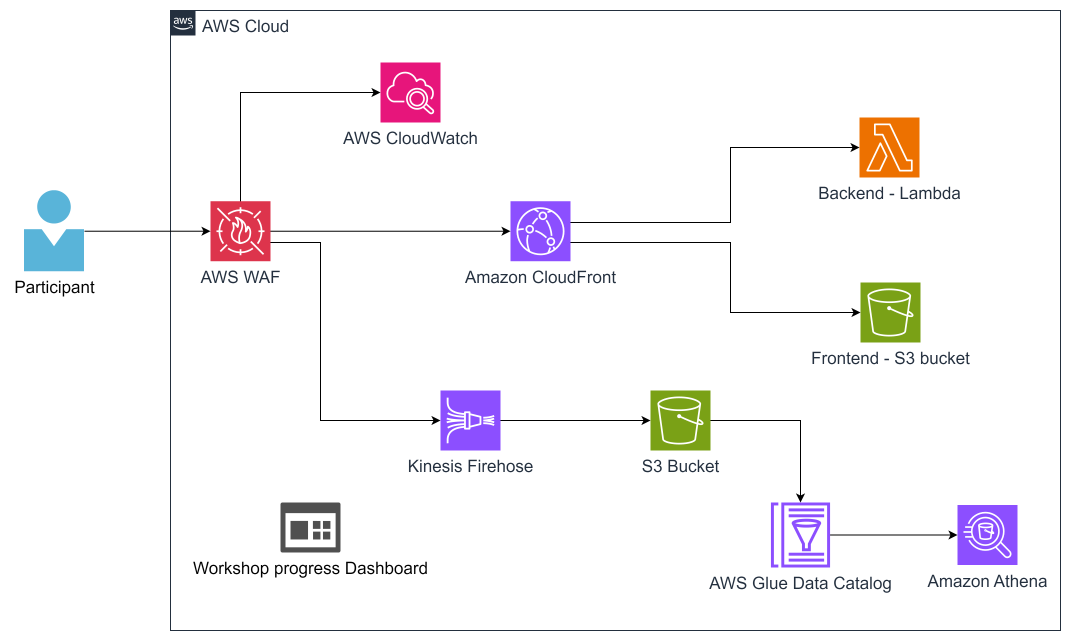
Workshop Architecture
The architecture of this workshop is shown as below:
Go to the Outputs tab of the Stack page of CloudFormation page.
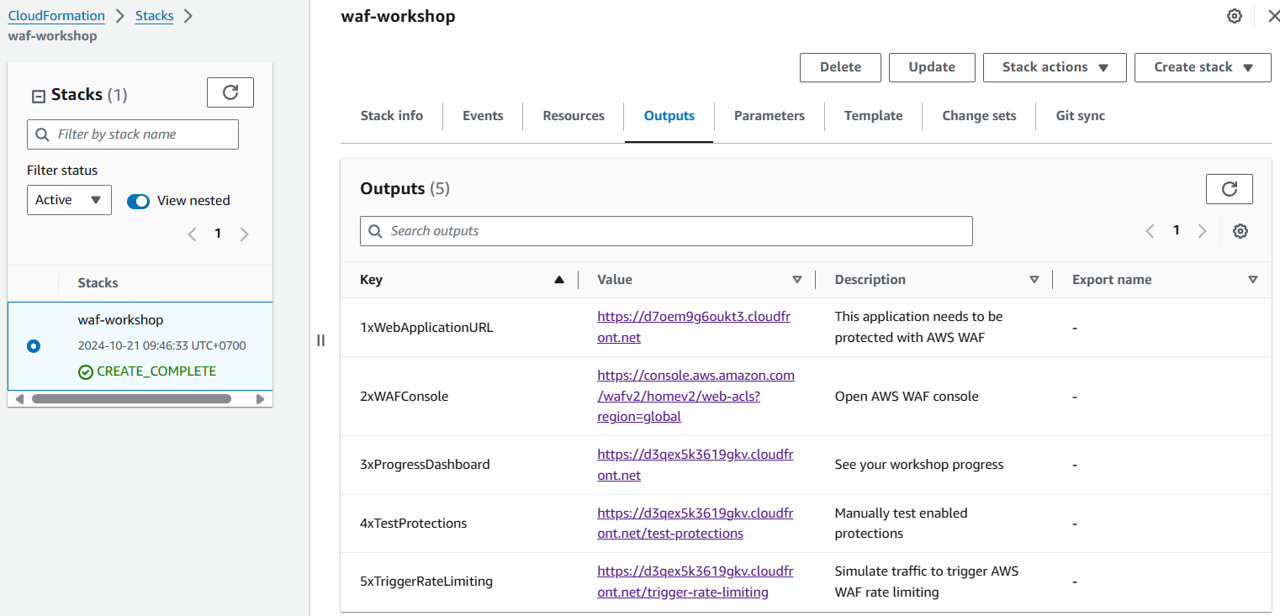
1xWebApplicationURL: The objective of this workshop is to use AWS WAF to protect this web.
2xWAFConsole: AWS WAF console.
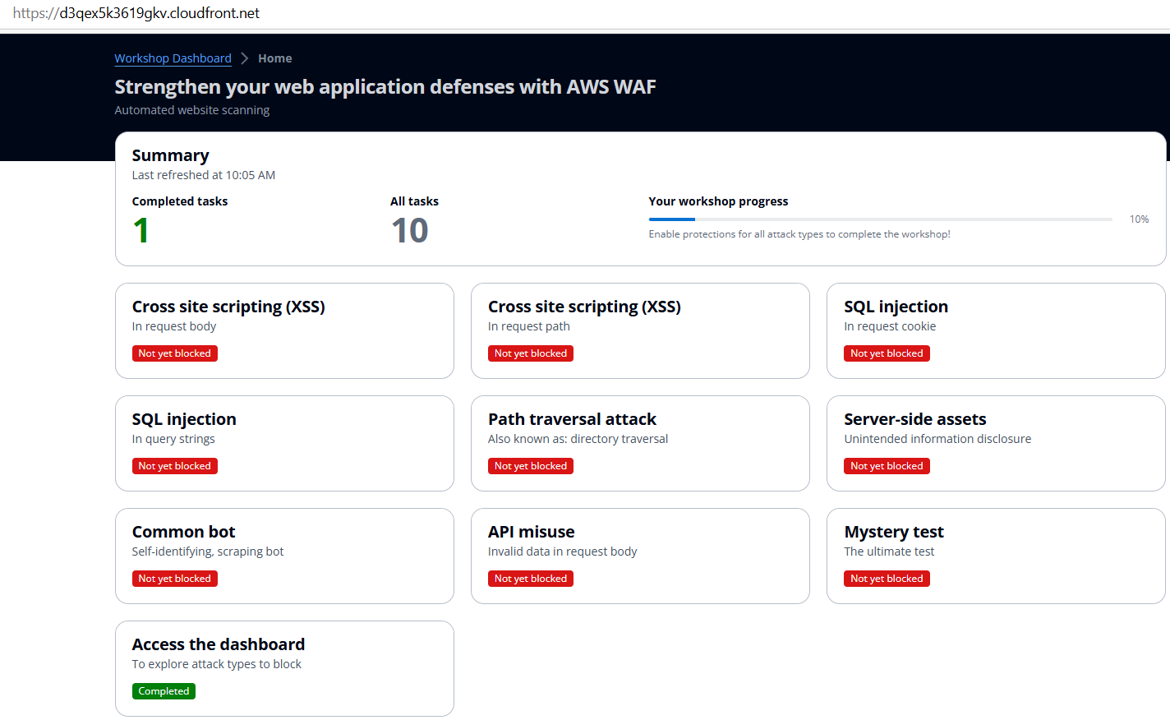
3xProgressDashboard: The dashboard to track your progress. It automatically marks a task complete after you have fixed a vulnerability.
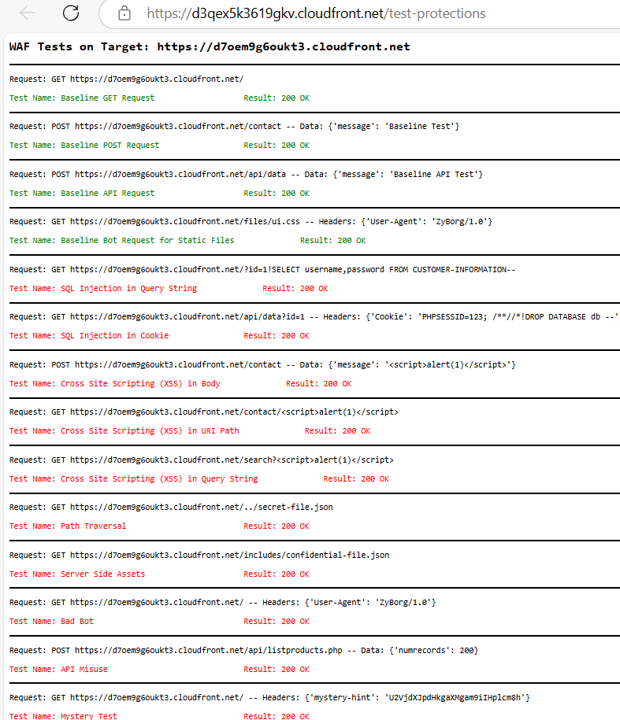
4xTestProtections: Manually examine the WAF defense with this link.
5xTriggerRateLimiting: contains a script that is triggered whenever this link is requested, it tests the rate-limiting function of AWS WAF.
Website Scanning Environment and Tools
You can examine the AWS WAF rules either by the automated scanning or the by manual scanning, which creates web exploitation vectors, such as SQLi, XSS, Path Traversal, Sensitive Path Access, Bot Activity, API Misuse.
The tests in this workshop are created for tracking your workshop progress with common cases. In the production environment, pleas keep in mind to carry out security analysis and testing processes byond the scope of this workshop.
Congratulations! You have just discovered the workshop architecture as well as the functions of 5 stack outputs and concepts of the scans on the web application. The next session will guide you about not only automated scanning but also how to trigger additional scans on demand.
Automated Scanning
Reachable by the CloudFormation stack outputs, the function of Progress Dashboard is to show the web application security posture with the automated tests to the configuration of the WAF.
Note that the small delay may happen during the data update. If you thin a task has been done, please wait 1 to 2 minutes then check again.
The next session will guide you how to execute manual scanning of web app defense.
Manual Scanning
This section walks you through the process of manually scanning your web application endpoint to evaluate the effectiveness of your WAF rules.
Running the Manual Scanner
Navigate to the Stack page and open the link under the 4xTestProtections output in a new tab. This initiates a scan of your web application endpoint. The scanner script tests your application and provides the following details:
- Request: The HTTP method used (e.g.,
GETorPOST). - Result: The HTTP status code received (e.g.,
200 OKor403 Forbidden).
The results are color-coded to give a quick overview of your WAF rules’ performance. Ideally, all tests should result in a green status code.
Baseline Requests simulate legitimate traffic and should not be blocked by your WAF rules. These requests must return a 200 OK status code to ensure valid users can access your application without issues.
Reviewing the Scan Results
After the scanner script completes, review the results to address the following:
- Were any baseline tests blocked? This might indicate that your WAF rules are overly restrictive and need adjustment.
- Did simulated malicious requests get blocked? If so, this confirms that your WAF rules are effectively protecting your application.
Simulating Requests Manually
The scanner script uses an AWS Lambda function to send test requests. You can mimic this behavior by sending similar requests from your device using tools like curl in the command line.
For simple tests, you can also use a browser to send basic GET requests with query string parameters and analyze the responses.
The scan results might highlight potential security vulnerabilities. The next step, Remediation, involves configuring an AWS WAF Web ACL to block these malicious requests. When AWS WAF blocks a request based on your rules, it will return a 403 Forbidden status code or a custom error code you’ve defined.
Congratulations! You’ve learned how to review your testing progress and evaluate protections. You’re now ready to proceed to the Remediate section, where you’ll implement crucial website protections using AWS WAF.