Respond to Malware on Amazon Elastic Block Store
Scenario / Problem Statement: In an earlier module, “Building your own automated response”, you explore methods of automated response. This module is related, but rather on focusing on automated respond, your task is to investigate a potentially compromised EC2 instance associated with a “UnauthorizedAccess:IAMUser/MaliciousIPCaller.Custom” GuardDuty finding. For this, you will use Amazon Detecitve.
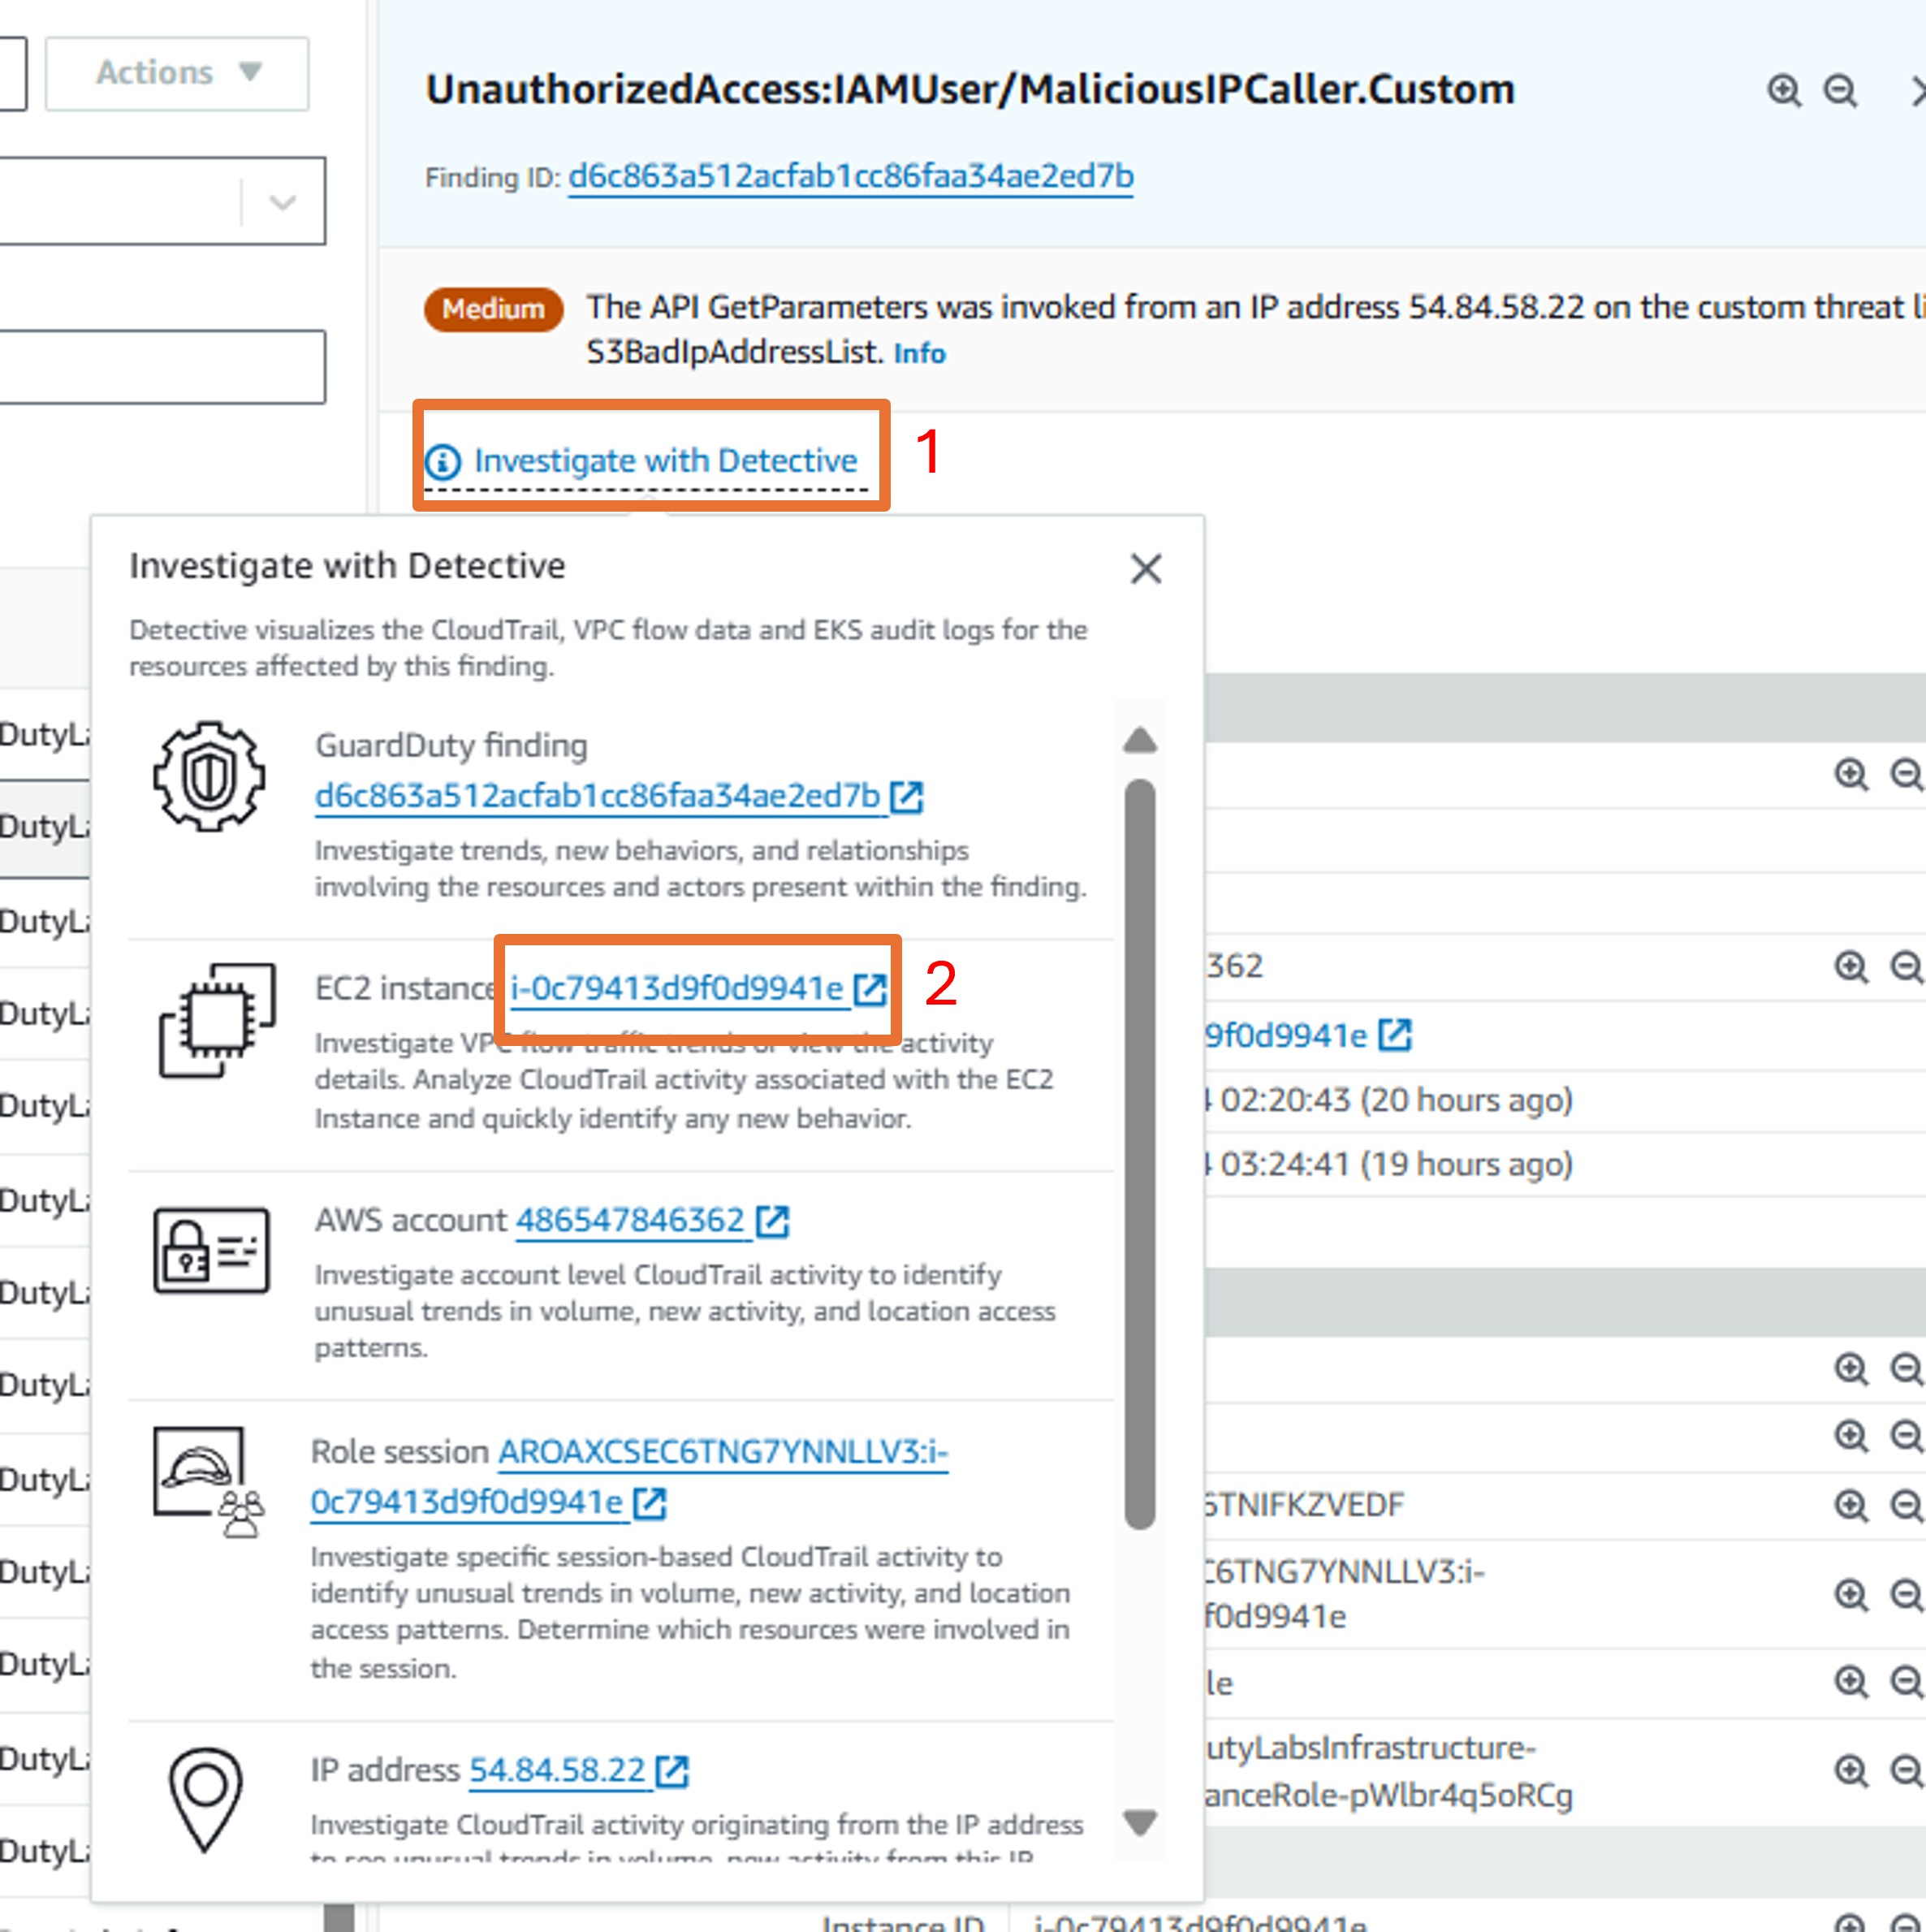
Open Amazon GuardDuty select a finding titled UnauthorizedAccess:IAMUser/MaliciousIPCaller.Custom to open the finding details.

At the top of the overview panel, click the link that is labeled Investigate with Detective
In the investigate with Detective pop up, select EC2 Instance to investigate the compromised EC2 instance.
Now you should be on the EC2 instance entity page in the Detective console with the UnauthorizedAccess:IAMUser/MaliciousIPCaller.Custom finding details on the right side of the screen. Proceed to answer some questions to accelerate you to root cause in your investigate.
Note that the scope time at the top of the page is set from when the event was first seen to the time the event was last seen by GuardDuty. This is important to understand because the scope time determines the data set that Detective is returning to you.
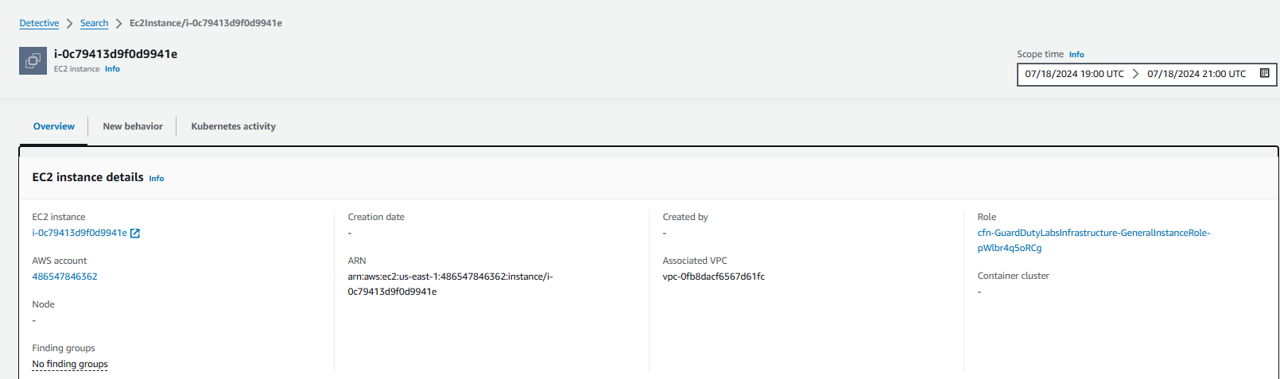
Look at the information presented in the top panel, EC2 instance details. AWS account, EC2 instance, Role, Associated VPC, and other information is listed. You can optionally click the links to pivot and learn more about the linked entities. For example, you could follow the linked role to understand the permissions of the role used by the EC2 instance or to see if there are other findings related to the role.
If you are interested in exlploring more of the information presented on this page, you should also complete the module titled: Respond to compromised IAM credentials.
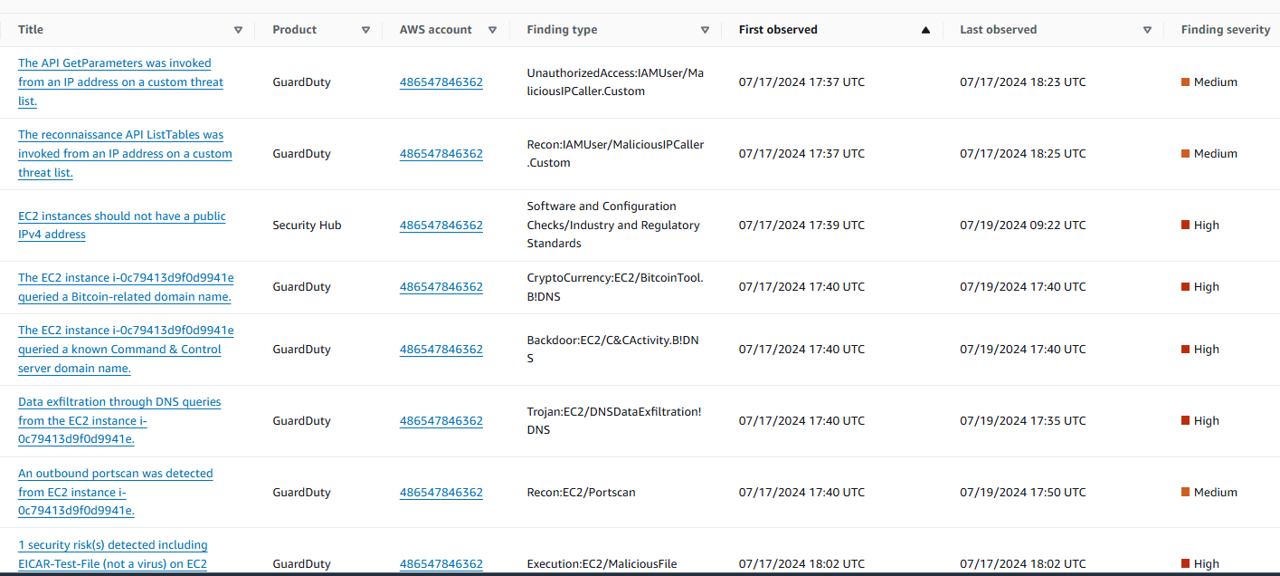
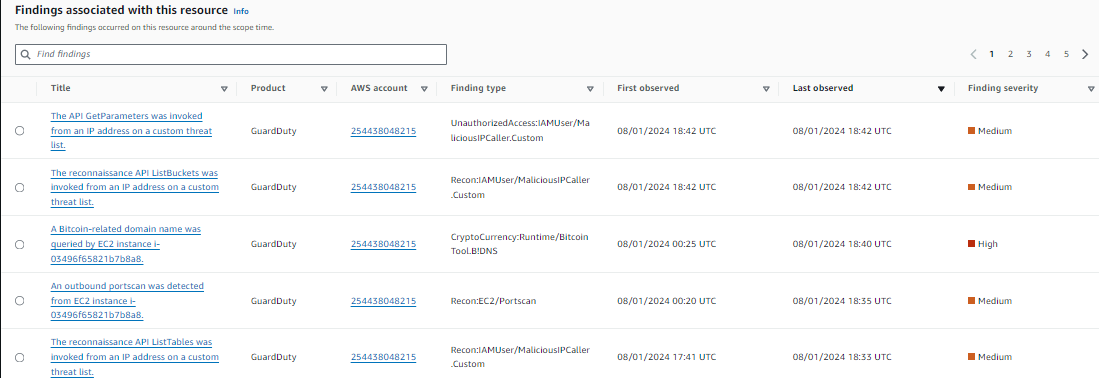
- Scroll down. Look at the Findings associated with this resource section. Review the findings in the order they were observed.
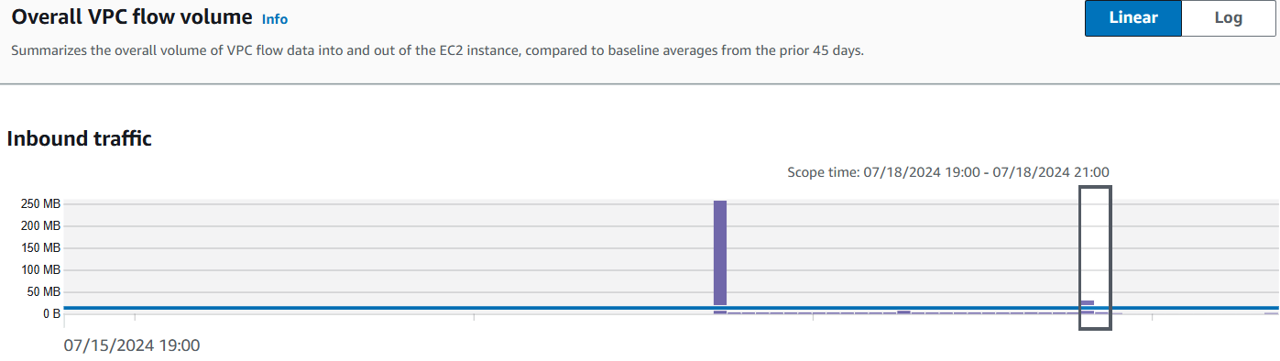
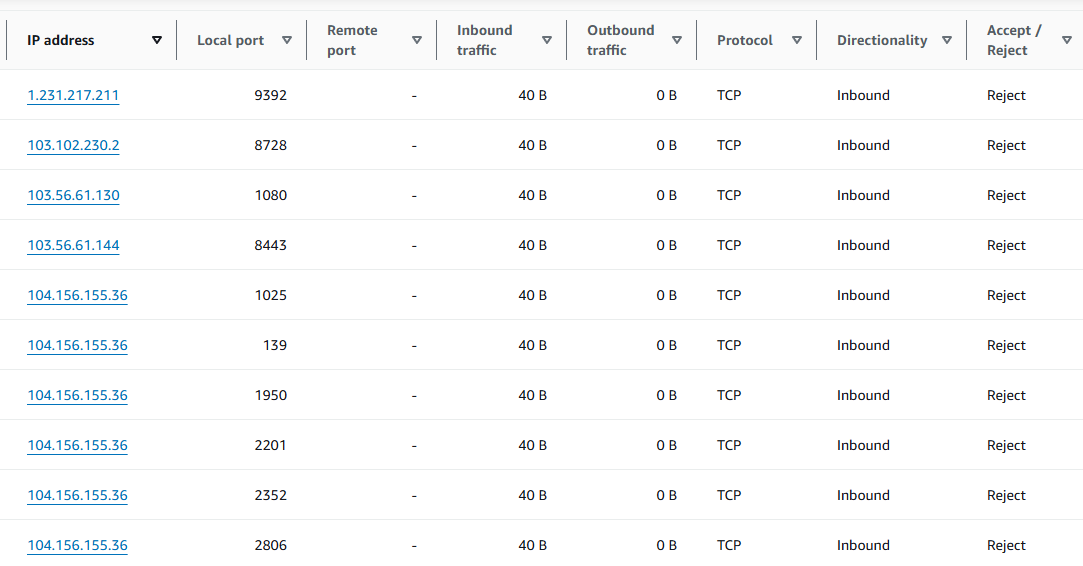
- Check out Overall VPC flow volume. Click on a spike in Inbound traffic and then click Set time interval. Review the Activity for time window. This shows the VPC flow data into and out of the EC2 instance. The Activity for time window will automatically adjust the time to the scope time of the column and list the IP address, ports, volume of inbound and outbound traffic, protocol and notate if the traffic was accepted or rejected.
- You can also check out the Distinct count of ports over time, Distinct IP addresses over time, and Observed IP address assignments based on VPC Flow.

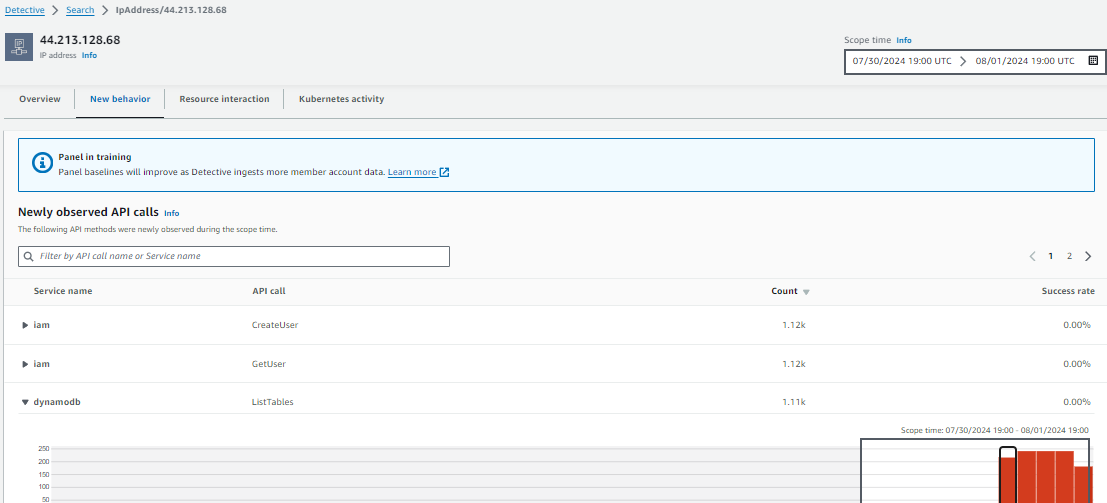
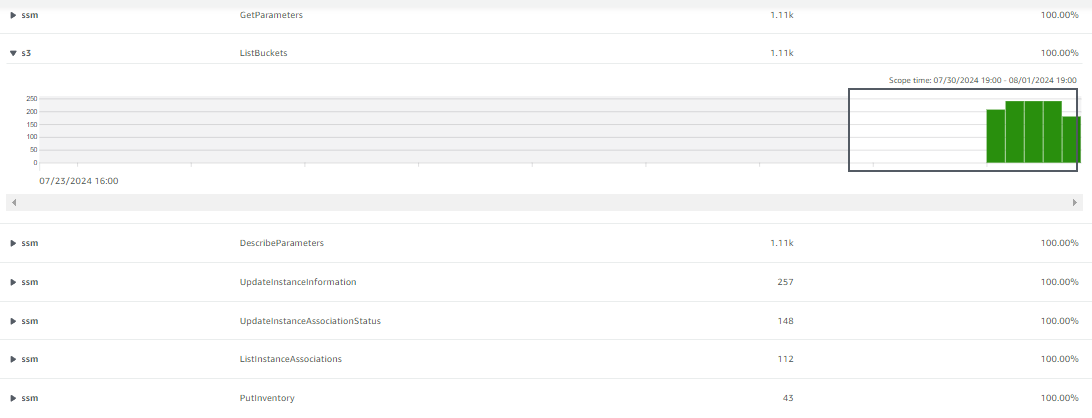
- Scroll up to the top of the EC2 instance entity page and select the tab labeled New behavior. In this tab Detective develops a picture of what activity is normal in your organization and what activity is unusual. Scroll through the different panels to determine what information you might be able to gather related to investigating a security issue.
Check one IP:

Set time interval to monitor:
 More detail:
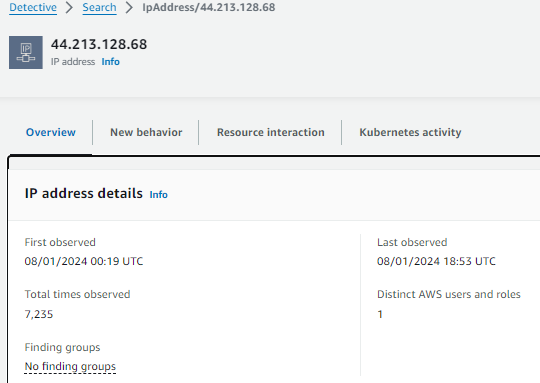
Search for the IP address of the actor
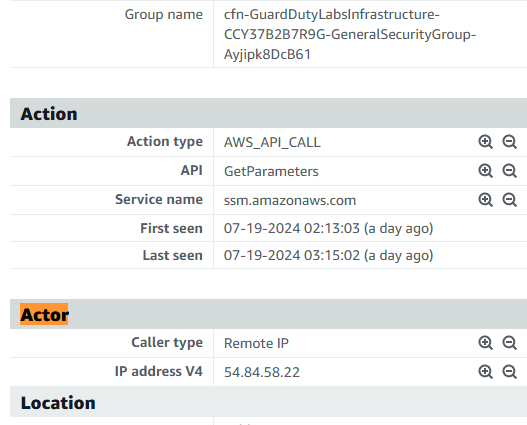
In the GuardDuty finding details on the left, note the IP address V4 listed under Actor.
Open the Search page from the navigation panel on the right.
Click on the Choose type drop down and choose IP address.
Input the IP address you noted from the GuardDuty finding details. Click Search.
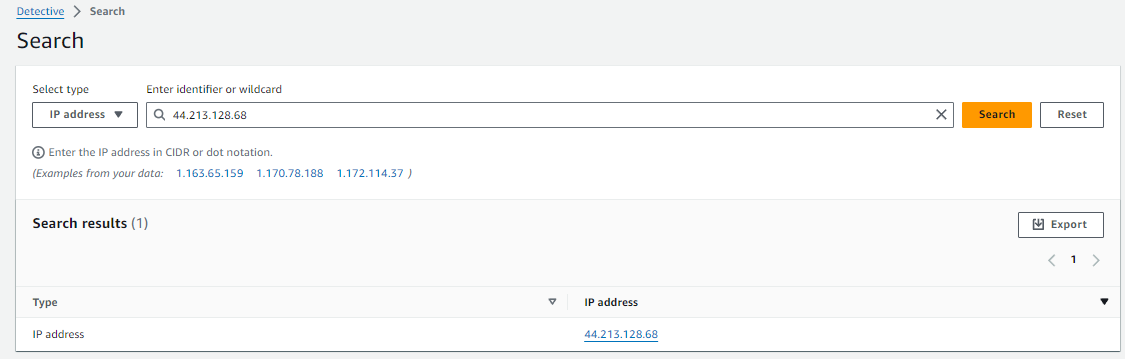
Select the IP address hyperlink to navigate to the IP address entity page.
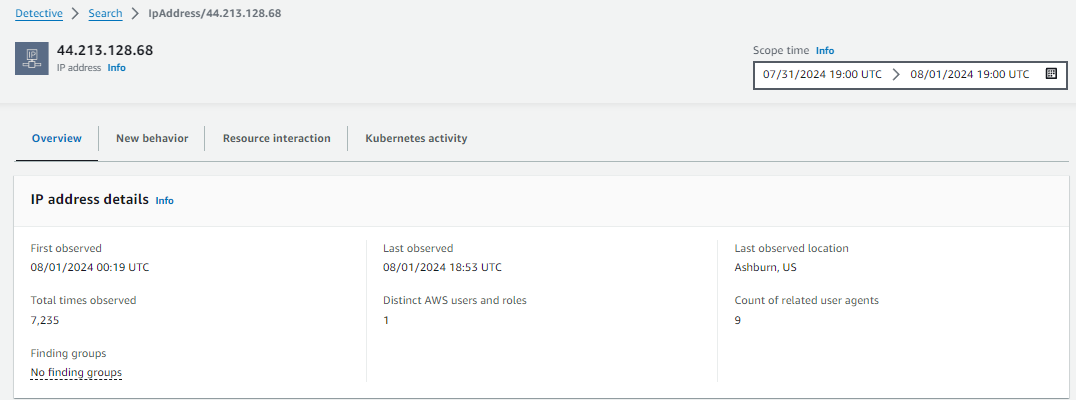
Just like in previous steps, take the to review information about the IP address. Search the page for:
First observed: 00:17 UTC
Total times observer: last obser – first observe
Last obser is 18:42 UTC so total time is 25
But different with the overview
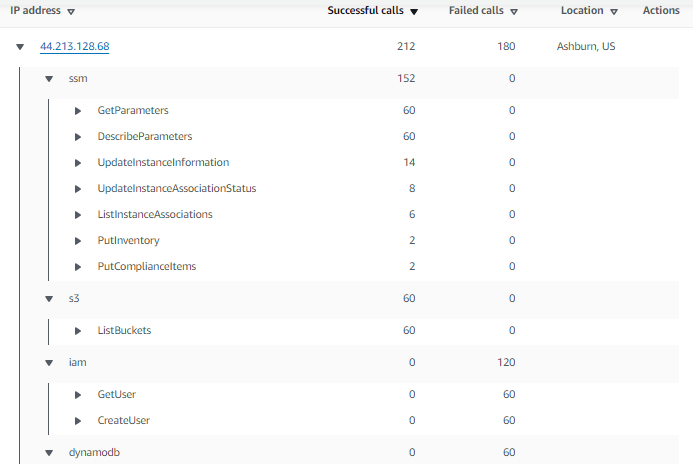
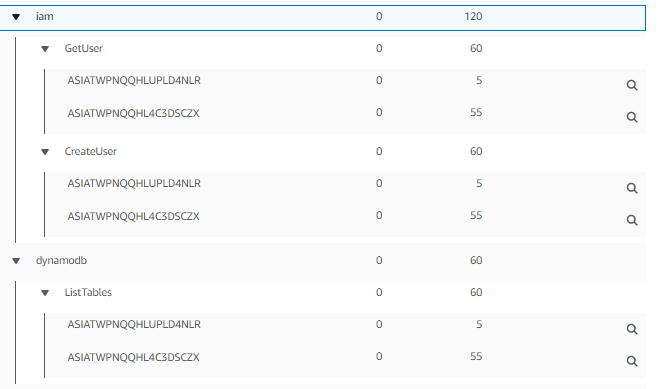
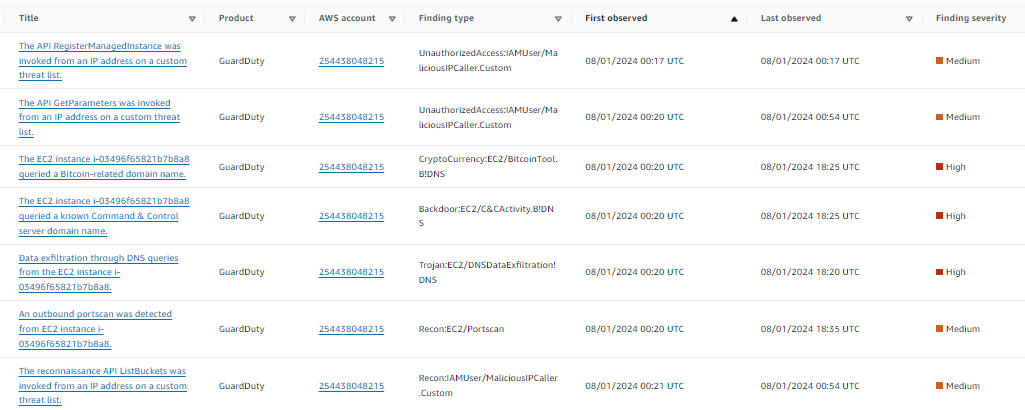
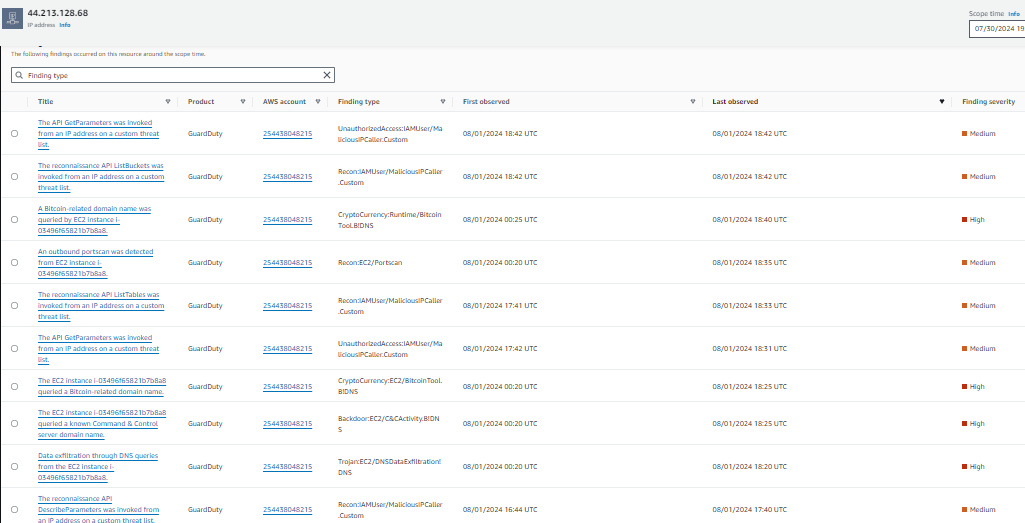
Findings associated with this resource
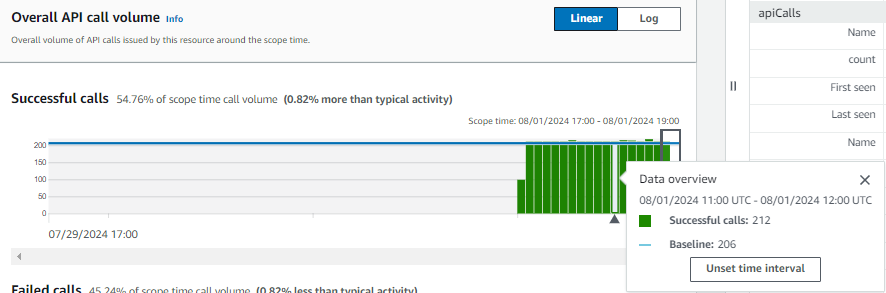
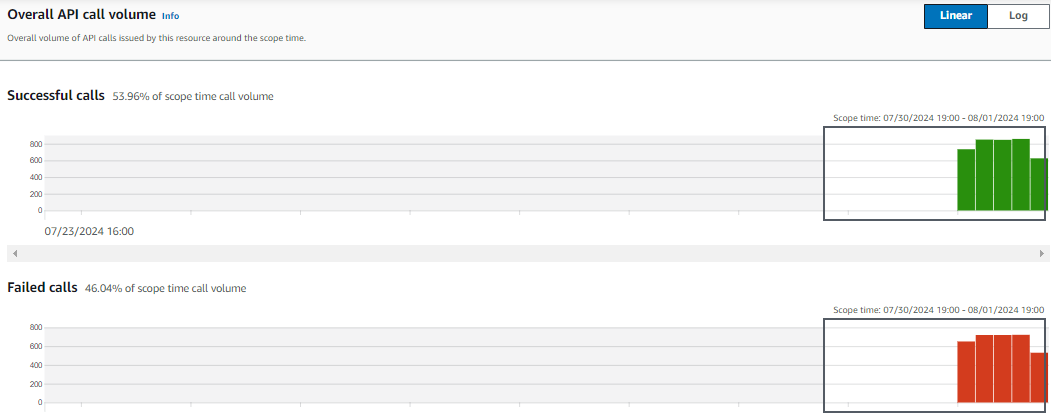
Overall API call volume
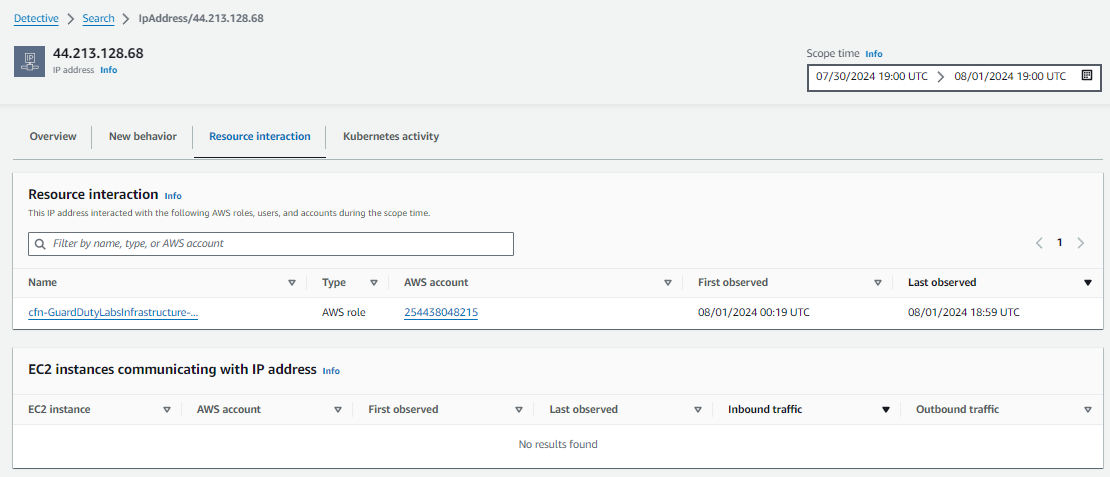
- Also explore the tabs, New behavior, Resource interaction, and Kubernetes activity.
Resource interaction:
 New behavior:
 18. In this scenario, you used Amazon Detective to find information to help with investigating a security issue with limited data. In a production environment with more data you will be able to leverage Detective even more effectively for things like newly observed activity, resource interaction, and traffic baselining. Now that you have used Amazon Detective to gather more information about the extent of the security issue you will have a better understanding of other resources that need to be remediated, permissions that need to be scoped down, and root cause analysis information to include in after action reports.