Respond to Malware on Amazon Elastic Block Store
Scenario / Problem Statement: You have been tasked with determining (and investigating) if GuardDuty has detected malware on Amazon Elastic Block Store (Amazon EBS) volumes that are attached to the Amazon Elastic Compute Cloud (Amazon EC2) instances and container workloads.
Before you begin, confirm that Malware Protection is setup in your account. Navigate to the GuardDuty console and open the Malware Protection page.
Confirm that “GuardDuty-initiated malware scan is enabled”. Malware Protection helps you detect the potential presence of malware by scanning the Amazon Elastic Block Store (Amazon EBS) volumes that are attached to the Amazon Elastic Compute Cloud (Amazon EC2) instances and container workloads.
GuardDuty provides you with the option to retain the snapshots of your EBS volumes in your AWS account when malware is found. By default, the snapshots retention setting is turned off. The snapshots will only be retained if you have this setting turned on before the scan initiates. If you turn on the snapshots retention setting for your account, when malware is found and the snapshots get retained, you will incur usage cost for the same. Toggle the “Retain scanned snapshots when malware is detected” on under General settings.
Investigate Malware detected by GuardDuty
Malware Protection offers two types of scans to detect potentially malicious activity in your Amazon EC2 instances and container workloads – GuardDuty-initiated malware scan and On-demand malware scan. A GuardDuty-initiated malware scan gets invoked when GuardDuty detects suspicious behavior indicative of malware on Amazon EC2 instance or container workloads. Review findings that invoke GuardDuty-initiated malware scan to learn about such GuardDuty findings that can initiate a malware scan. These findings are referred to as trigger findings in this workshop. A new Malware Protection finding is generated for each scan that detects malware.
Open the Findings page in GuardDuty.
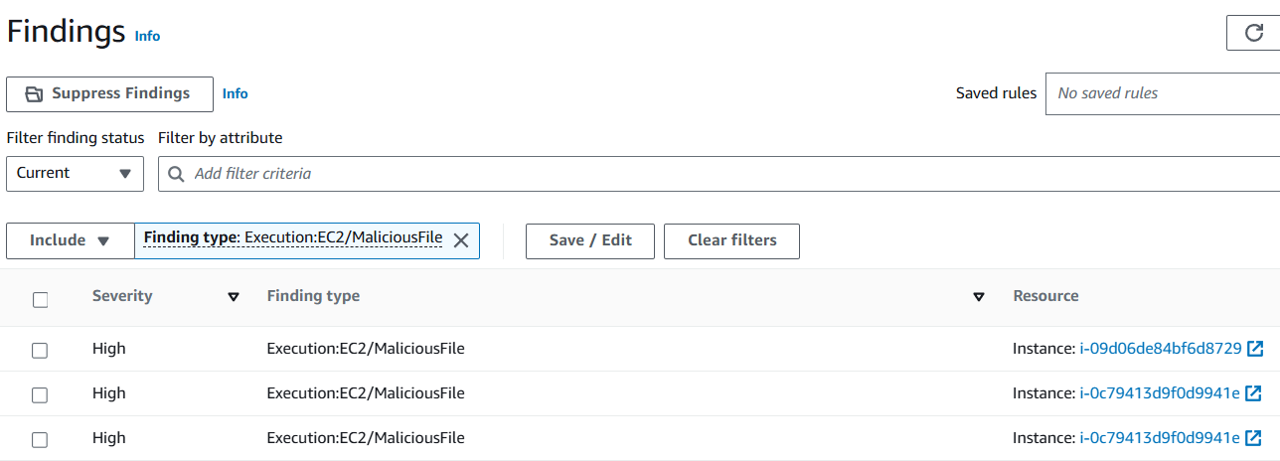
In the field Add filter criteria select Finding Type and type “Execution:EC2/MaliciousFile”. Click Apply.
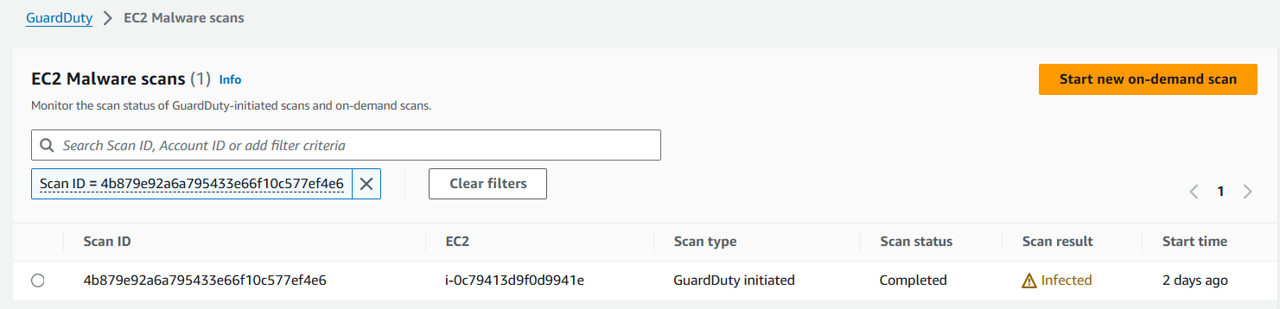
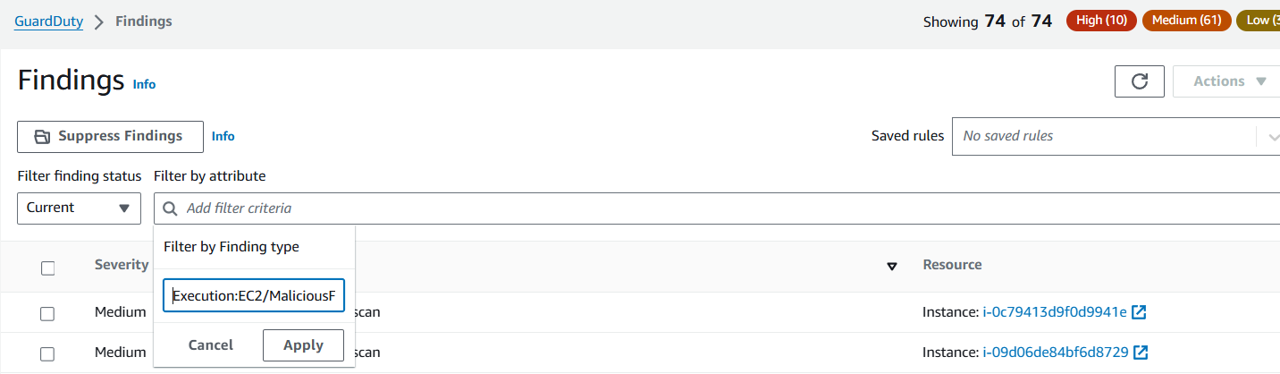 Result:
Click on one of the matching findings to view details. Take a few minutes to review the finding and identify the affected EC2 instance, the malware file path and file name, and other information about the finding.
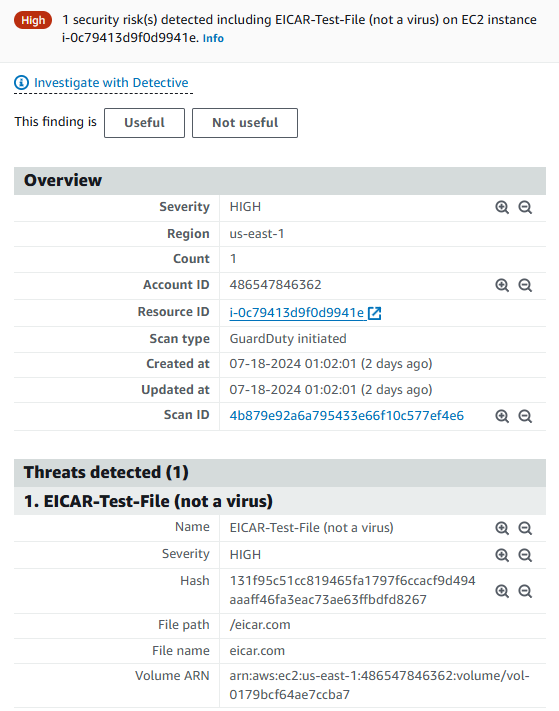 affected instance: i-0c79413d9f0d9941e
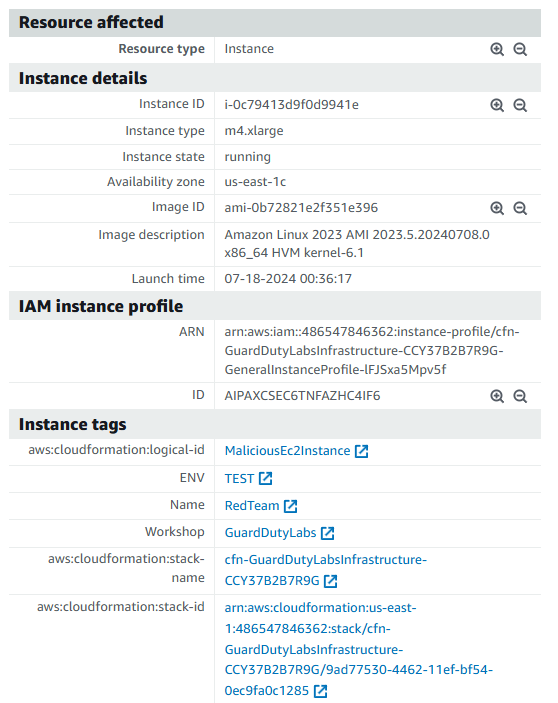 Malware file path: /eicar.com
 Malware file name: eicar.com
If you update the Finding Type filter to “Execution:ECS/MaliciousFile”, you will see malware findings for containers.
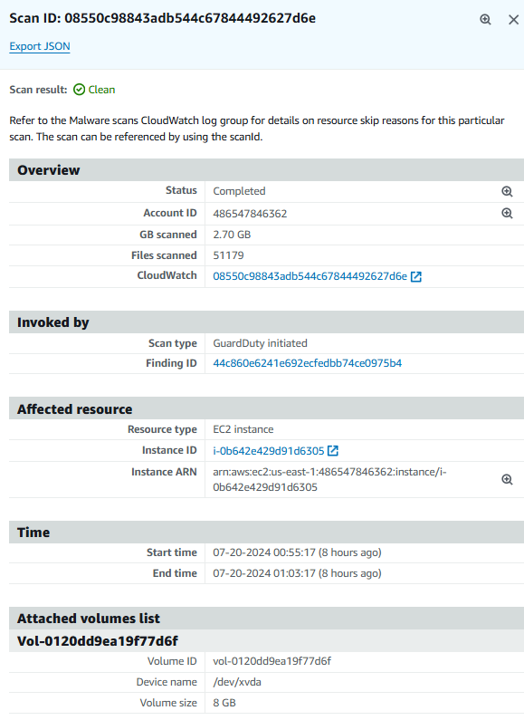
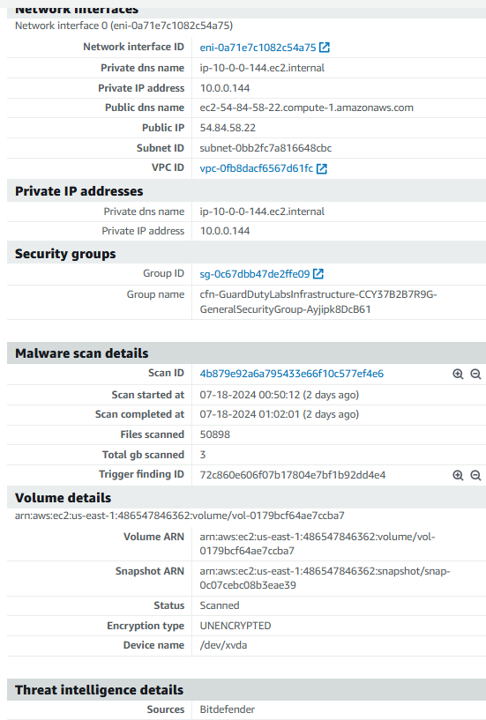
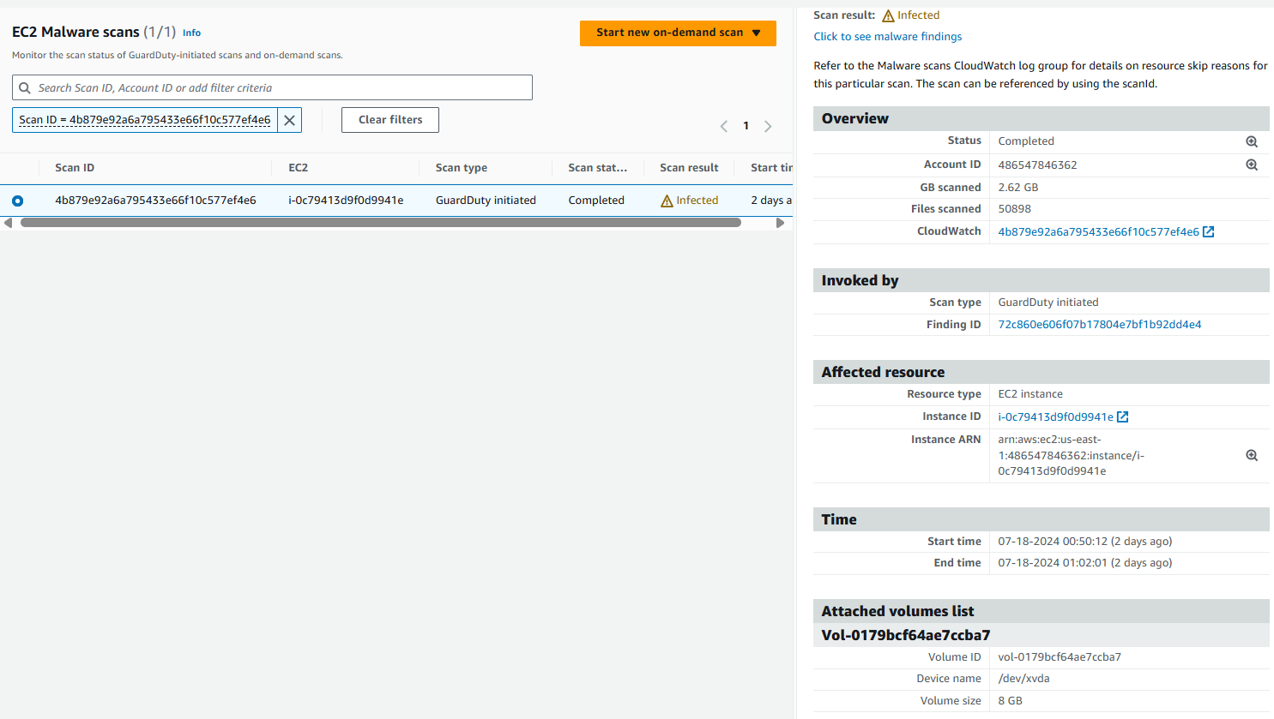
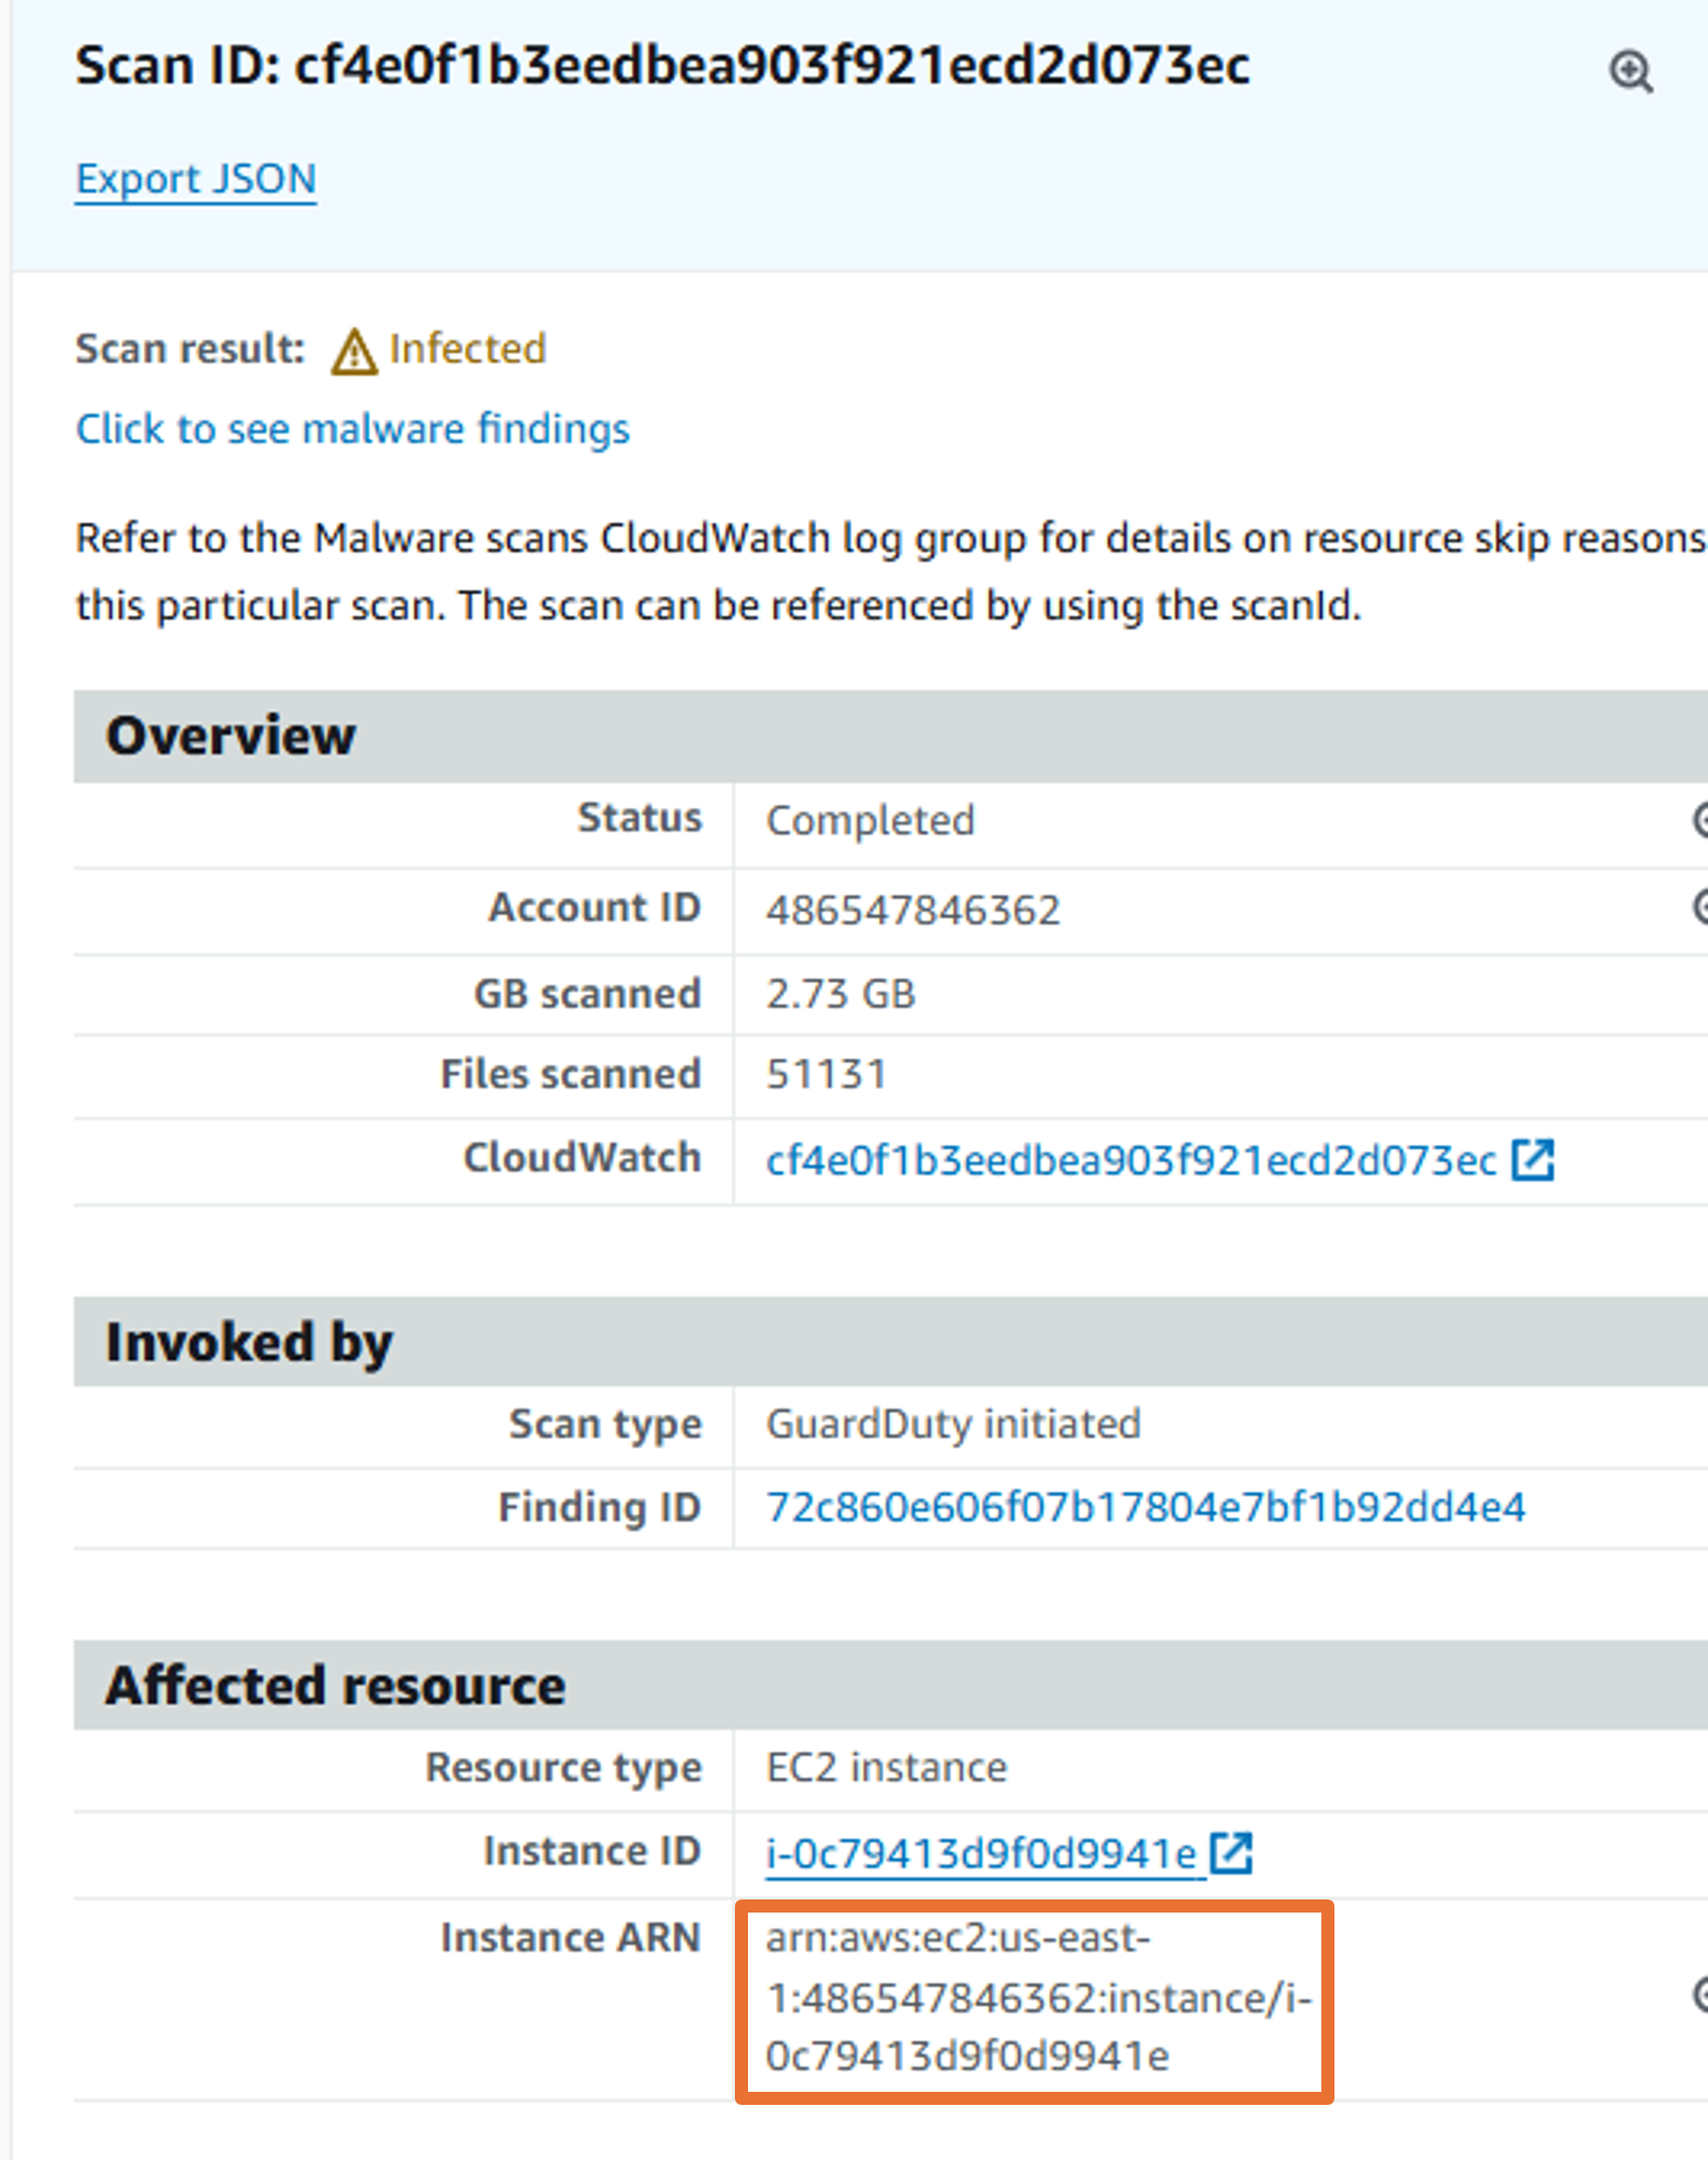
Click the “Scan ID” link from the finding details to get further details of the scan. The link will take you to the malware scans page. Click again on the scan ID. Here you will see additional details such as the scanned volume size, the volume that is infected and the time it took to run the scan. You will also see the the Finding ID of the trigger finding that invoked the scan.
 View the finding:
{
  "DetectorId": "c8c860de84297606e66fe1417c3ba44a",
  "AdminDetectorId": "c8c860de84297606e66fe1417c3ba44a",
  "ScanId": "4b879e92a6a795433e66f10c577ef4e6",
  "ScanStatus": "COMPLETED",
  "ScanStartTime": "2024-07-17T17:50:12.000Z",
  "ScanEndTime": "2024-07-17T18:02:01.000Z",
  "TriggerDetails": {
    "GuardDutyFindingId": "72c860e606f07b17804e7bf1b92dd4e4"
  },
  "ResourceDetails": {
    "InstanceArn": "arn:aws:ec2:us-east-1:486547846362:instance/i-0c79413d9f0d9941e"
  },
  "ScanResultDetails": {
    "ScanResult": "INFECTED"
  },
  "AccountId": "486547846362",
  "TotalBytes": 2619136718,
  "FileCount": 50898,
  "AttachedVolumes": [
    {
      "VolumeArn": "arn:aws:ec2:us-east-1:486547846362:volume/vol-0179bcf64ae7ccba7",
      "VolumeType": "gp3",
      "DeviceName": "/dev/xvda",
      "VolumeSizeInGB": 8,
      "EncryptionType": "UNENCRYPTED",
      "SnapshotArn": "arn:aws:ec2:us-east-1:486547846362:snapshot/snap-0c07cebc08b3eae39"
    }
  ],
  "ScanType": "GUARDDUTY_INITIATED"
}
The possible values for scan Status are Completed, Running, Skipped, and Failed. After the scan completes, the Scan result is populated for scans that have the Status as Completed. Possible values for Scan result are Clean and Infected. Using Scan type, you can identify if the malware scan was GuardDuty initiated or On demand.
- Select the link next to Finding ID. This will take you to a new page that displays only the trigger finding. Then select the finding and explore details about the trigger finding. The trigger finding also has a section titled Malware scan that lists details about the scan.
For each Amazon EC2 instance and container workload for which GuardDuty generates findings, an automatic GuardDuty-initiated malware scan gets invoked once every 24 hours. If multiple trigger findings are generated in a 24-hour period for an EC2 instance, only the first trigger finding will invoke a scan.
- If this was the only EC2 instance that was compromised, you could proceed to investigate and isolate the instance following an incident response playbook (this is out of scope for this module). If you enabled the setting to retain snapshots for EBS volumes, these snapshots will be retained in your account only when malware is found, you can use these snapshots for further investigations.
[Optional] Initiating a Malware scan on-demand
If you want to detect the presence of malware in your Amazon EC2 instances on-demand, you can initiate an on-demand malware scan by providing the Amazon Resource Name (ARN) of the Amazon EC2 instance that you want to scan. You can also run an on-demand malware scan after you have remediated the files identified by GuardDuty as part of a previous malware finding and want to verify the file is no longer present.
From the Findings page, open one of the Execution:EC2/MaliciousFile findings to view the details again.
You need the Amazon Resource Name (ARN) of the EC2 instance in order to initiate an on-demand malware scan. The ARN looks like “arn:aws:ec2:{region}:{account ID}:instance/{instance ID}”. Construct the ARN using the information from the finding.
Your resource ID should look like “arn:aws:ec2:us-east-1:012345678901:instance/i-123456xxyyzzaaabb2”
Open the Malware scans page from the navigation on the left.
Click the Start new on-demand scan button.
Input the EC2 instance ARN, then click Confirm.
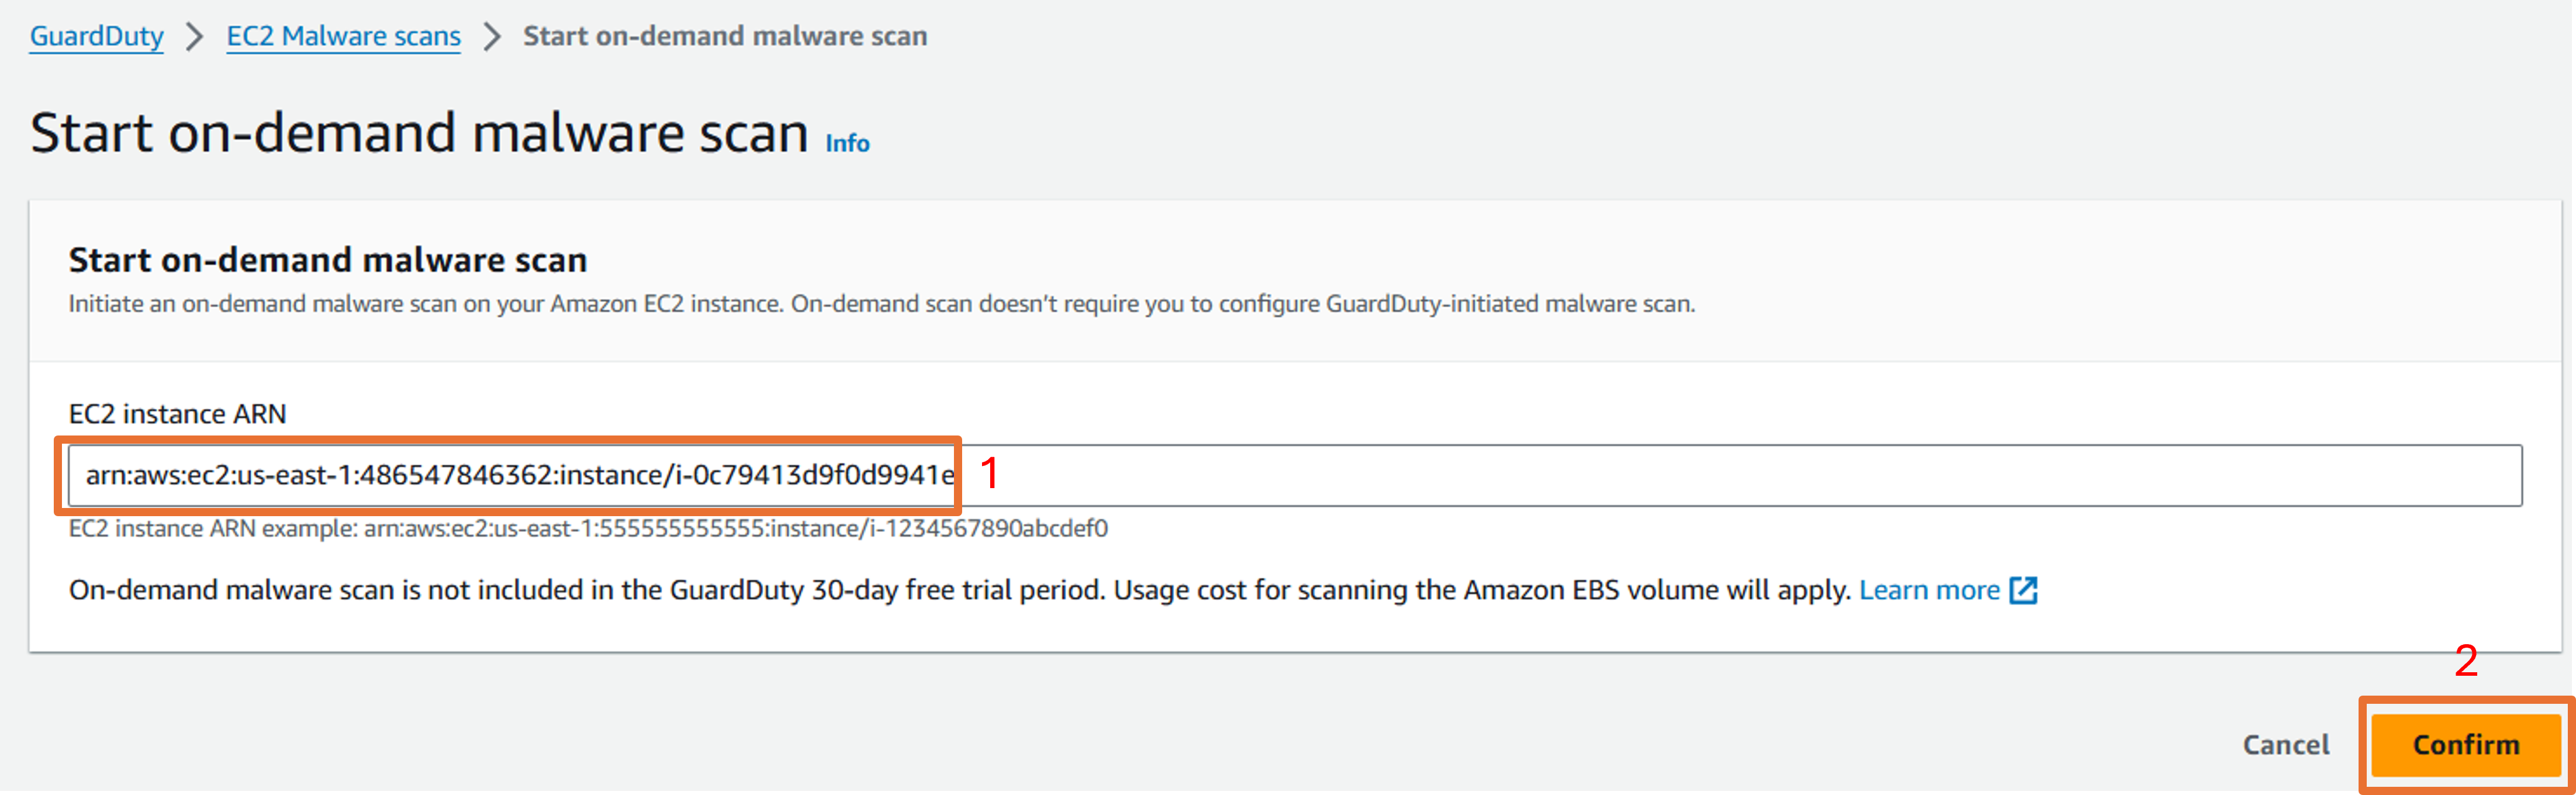
Now refresh the page, you will see a new scan ID with scan type as ‘On demand’ with a scan status of ‘Running’.