Building your own automated response
Scenario / Problem Statement: Your manager has asked you to explore automation to remediate security findings starting with the types of findings that require the fastest time to remediation.
Unlike how you set up the notification earlier, you may not want fully automate responses to findings. To set up automation that you can manually trigger it for specific findings, you can use custom actions. A custom action is a Security Hub mechanism for sending selected findings to EventBridge that can be matched by an EventBridge rule. The rule defines a specific action to take when a finding is received that is associated with the custom action ID. Custom actions can be used, for example, to send a specific finding, or a small set of findings, to a response or remediation workflow. You can create up to 50 custom actions.
In this section, we will walk you through how to create a custom action in Security Hub which will trigger an EventBridge rule to execute a Lambda function. The purpose of the Lambda function will be to alter the Security Group for an EC2 instance. This is just an example of how to build your own automations. This example is not production ready.
Create the Security Group
Navigate to the EC2 console and open the Security Groups page using the navigation on the left.
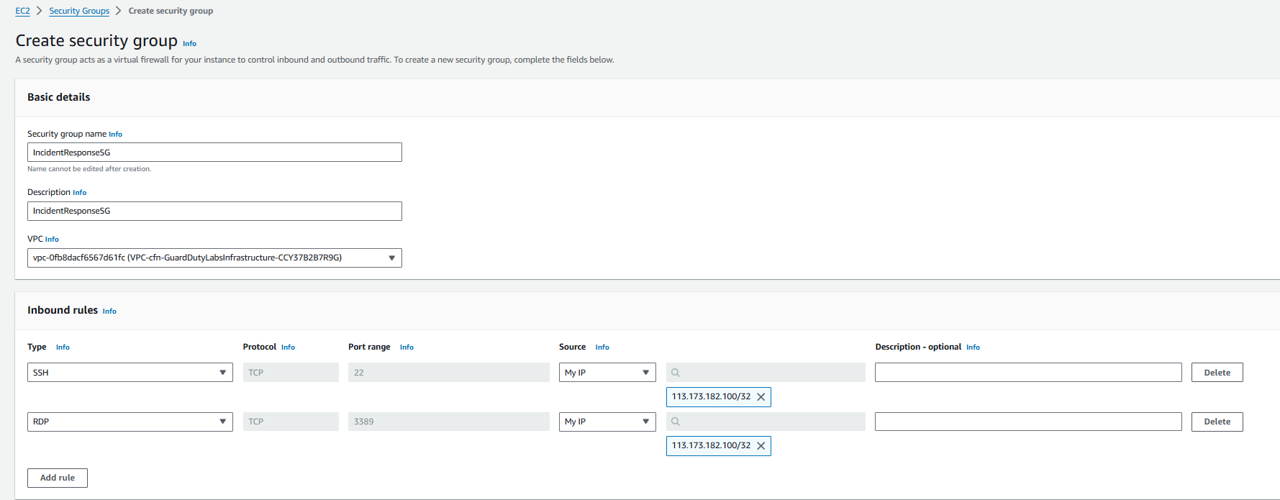
Click Create Security Group. Here, you will set up the Security Group you want applied to the instance during incident response. You want to limit traffic to just what is neccessary to your corporate CIDR. Set the Security group name to “IncidentResponseSG” and give it a description.
Delete the VPC specified and select the VPC that shows “cfn-GuardDutyLabs…”.
Delete the outbound rule added by default.
Add 2 inbound rules so that your corporate CIDR can RDP and SSH to the instance. Follow the screenshot below.
The CIDR blocks are just fake examples that would represent your corporate CIDR in order to allow your security team to RDP and SSH into the instance for forensics.
Save the Security Group by clicking Create Security Group.
Copy the Security group ID AND the VPC ID for your new security group. You will need these IDs to complete this module.
 Result:

Create the Lambda function
Let’s create the Lambda function we will use to swap the security group on the instance. Go to https://console.aws.amazon.com/lambda/home?#/create/function?intent=authorFromScratch
On the Create function page, set the Function name to “IR-ChangeInstanceSecurityGroup” and pick Node.js 20.x for the Runtime.
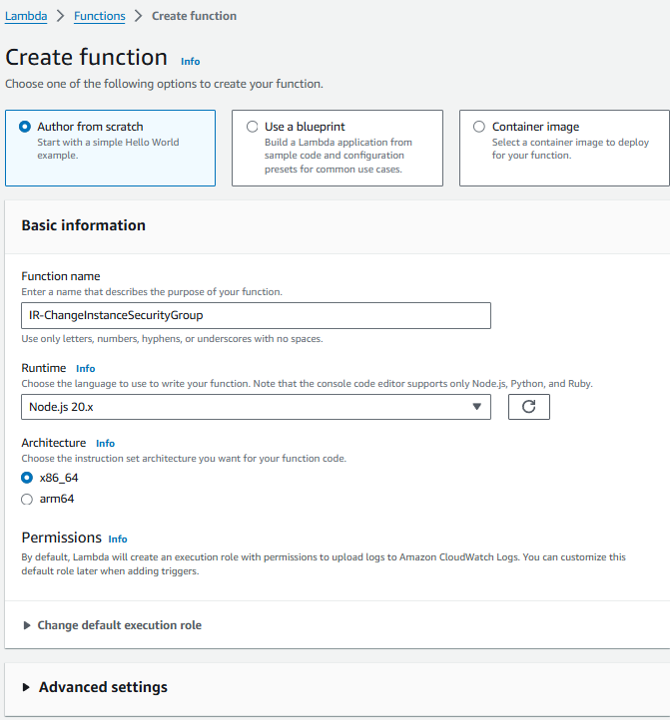
Click Create function.
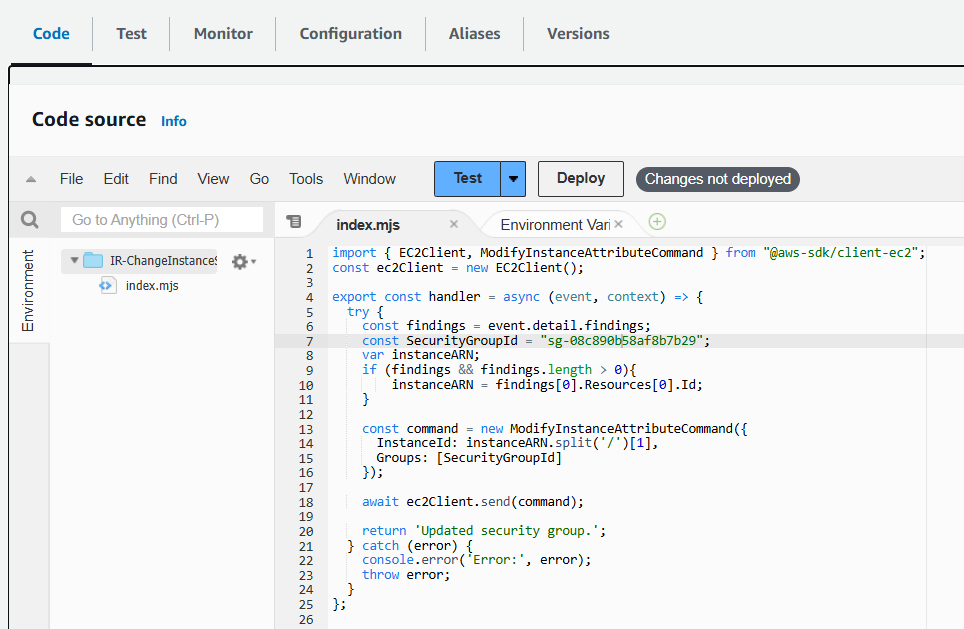
Copy and paste the following code into the editor labeled Code source (removing the existing code). Replace the value for SecurityGroupId (currently set to “sg-XXXXXXXXXXXX”) with the security group ID you noted earlier.
import { EC2Client, ModifyInstanceAttributeCommand } from "@aws-sdk/client-ec2";
const ec2Client = new EC2Client();

export const handler = async (event, context) => {
  try {
    const findings = event.detail.findings;
    const SecurityGroupId = "sg-XXXXXXXXXXXX";
    var instanceARN;
    if (findings && findings.length > 0){
        instanceARN = findings[0].Resources[0].Id;
    }

    const command = new ModifyInstanceAttributeCommand({
      InstanceId: instanceARN.split('/')[1],
      Groups: [SecurityGroupId]
    });

    await ec2Client.send(command);

    return 'Updated security group.';
  } catch (error) {
    console.error('Error:', error);
    throw error;
  }
};
- Then from the Code source menu, click File then Save. Then click the Deploy button.
Update Lambda function permissions
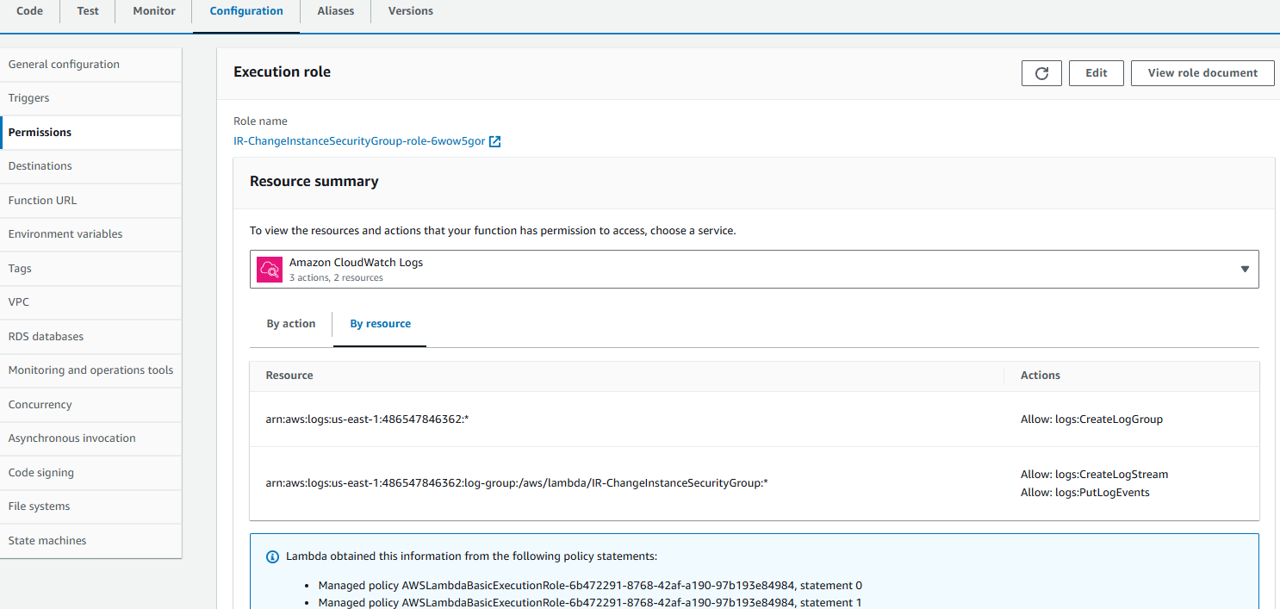
Directly above the Code source section for the Lambda function you created, click the Configuration tab. Then click Permissions from the left navigation appears. We need to modify the execution role for this Lambda function.
Click the Role name. It should start with “IR-ChangeInstanceSecurityGroup-role-”. This will take you to the role in the Identity and Access Management (IAM) console.
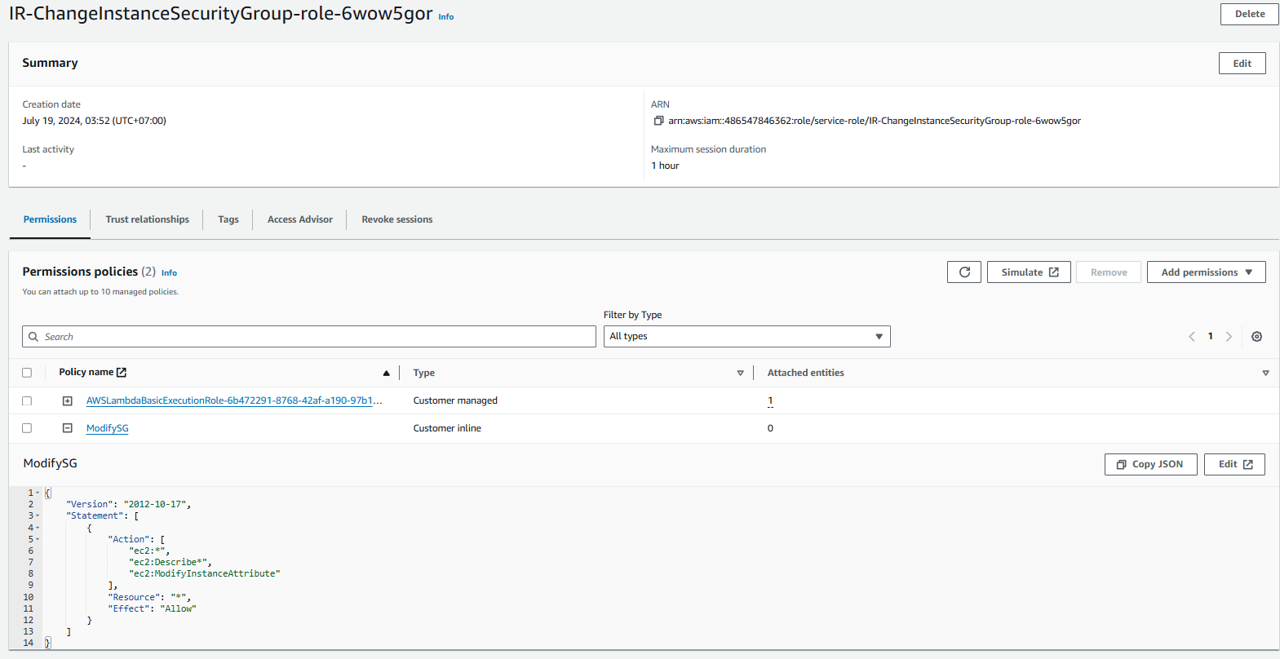
From the Role page, click the Add permissions button and select Create inline policy.
On the Create policy page, click the JSON tab. Then replace the existing policy with the following policy (do not use this policy in production, it does not follow least privilege).
{
    "Version": "2012-10-17",
    "Statement": [
        {
            "Action": [
                "ec2:*",
                "ec2:Describe*",
                "ec2:ModifyInstanceAttribute"
            ],
            "Resource": "*",
            "Effect": "Allow"
        }
    ]
}
Click the Next button. If you see a banner stating You need permissions, ignore it.
Give your policy the name “ModifySG” and click Create policy.
Create a Custom Action in Security Hub
Open Security Hub. Open the Custom actions page under Management in the navigation on the left.
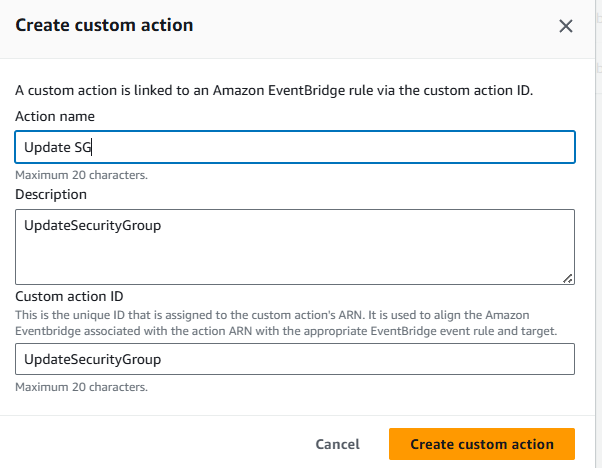
Click the Create custom action button.
Enter an Action Name, Action Description, and an Action ID that are representative of an action that you are implementing, for example, “UpdateSecurityGroup”.
Click Create custom action.
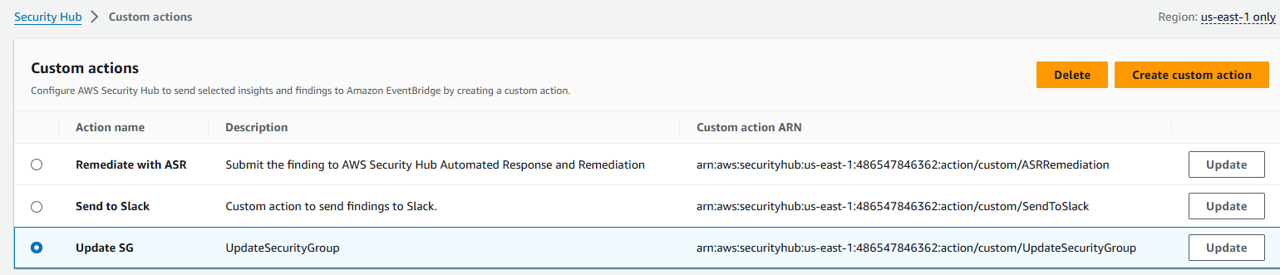 23. Copy the Custom action ARN that was generated. You will need the Custom ARN in the next steps.
Create Amazon EventBridge Rule to capture the Custom Action
In this section, you will define an EventBridge rule that will match events (findings) coming from Security Hub which were forwarded by the custom action you defined above.
Navigate to the Amazon EventBridge console.
Click on the Create rule on the right side.
In the Define rule detail page give your rule a name and a description that represents the rule’s purpose (for example, the same name and description you used for the custom action). Then click Next.
All Security Hub findings are sent as events to the AWS default event bus. The define pattern section allows you to identify filters to take a specific action when matched events appear. On the Build event pattern step, leave the Event source set to AWS events or EventBridge partner events.
Scroll down to Event pattern. Under Event source, leave it set to AWS Services, and under AWS Service, select Security Hub.
For the Event Type, choose Security Hub Findings – Custom Action.
Then select the Specific custom action ARN(s) radio button and enter the ARN for the custom action that you created earlier.
Notice that as you selected these options, the Event pattern on the right was updating. Click Next.
On the Select target(s) step, select Lambda function from the Select a target dropdown. Then select IR-ChangeInstanceSecurityGroup from the Function dropdown.
Click Next.
On the Configure tags step, click Next.
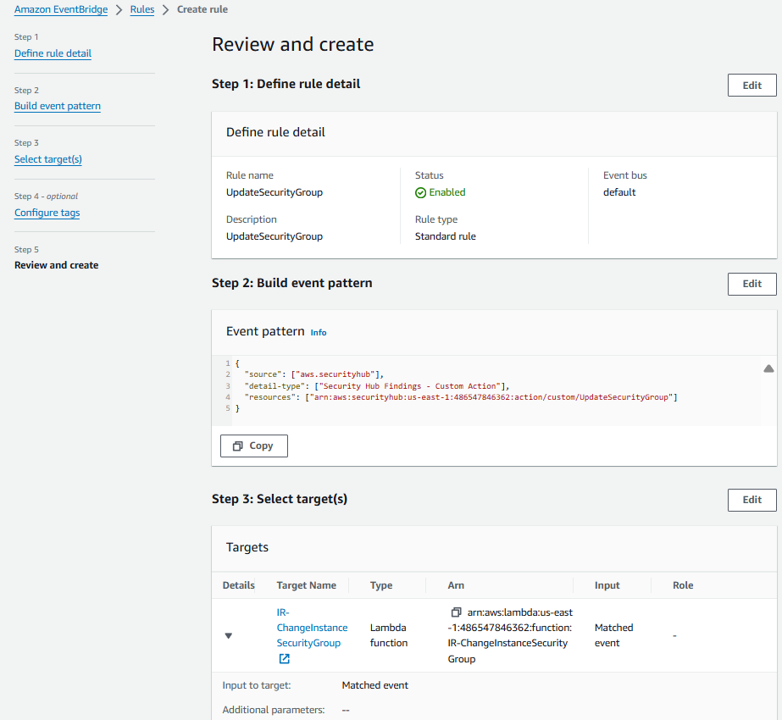
On the Review and create step, click Create rule.
Trigger the automation
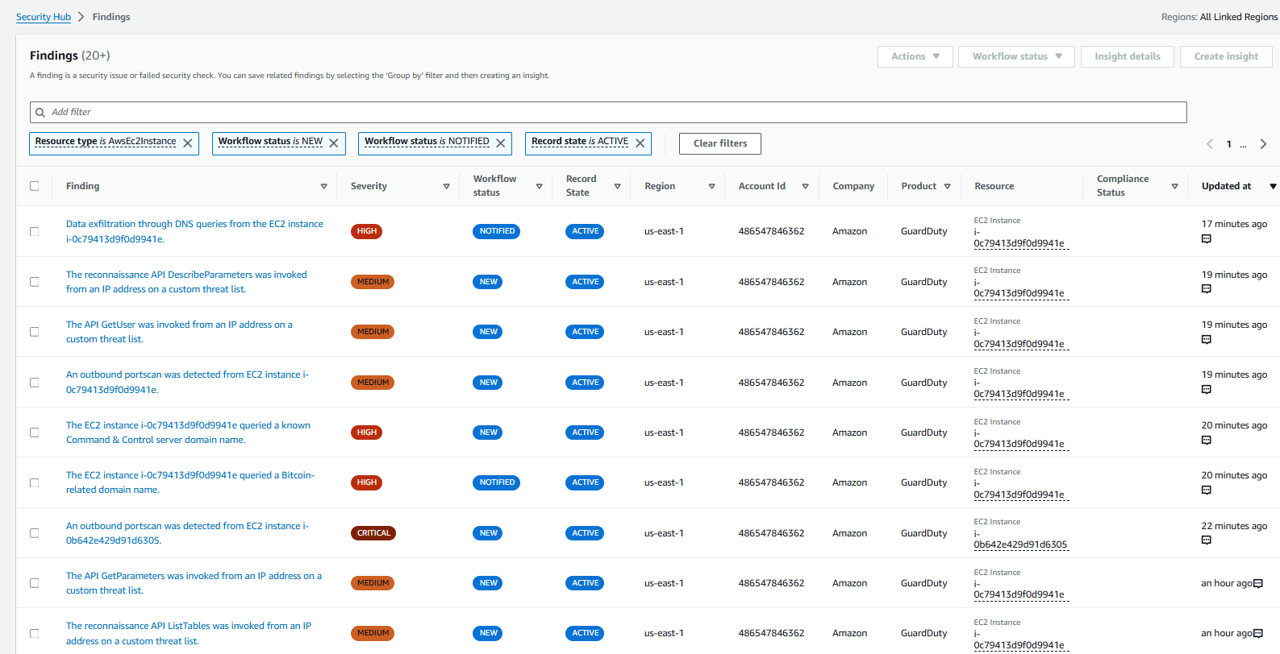
Your automation is now setup. Let’s test it on a finding for an EC2 instance. Return to the Findings page in Security Hub.
Add a filter for Resource Type and enter AwsEc2Instance (case sensitive). Click Apply.
Add a another filter for EC2 Instance VPC ID and for input the VPC ID you noted when you created the Security Group at the start of this module. Click Apply.
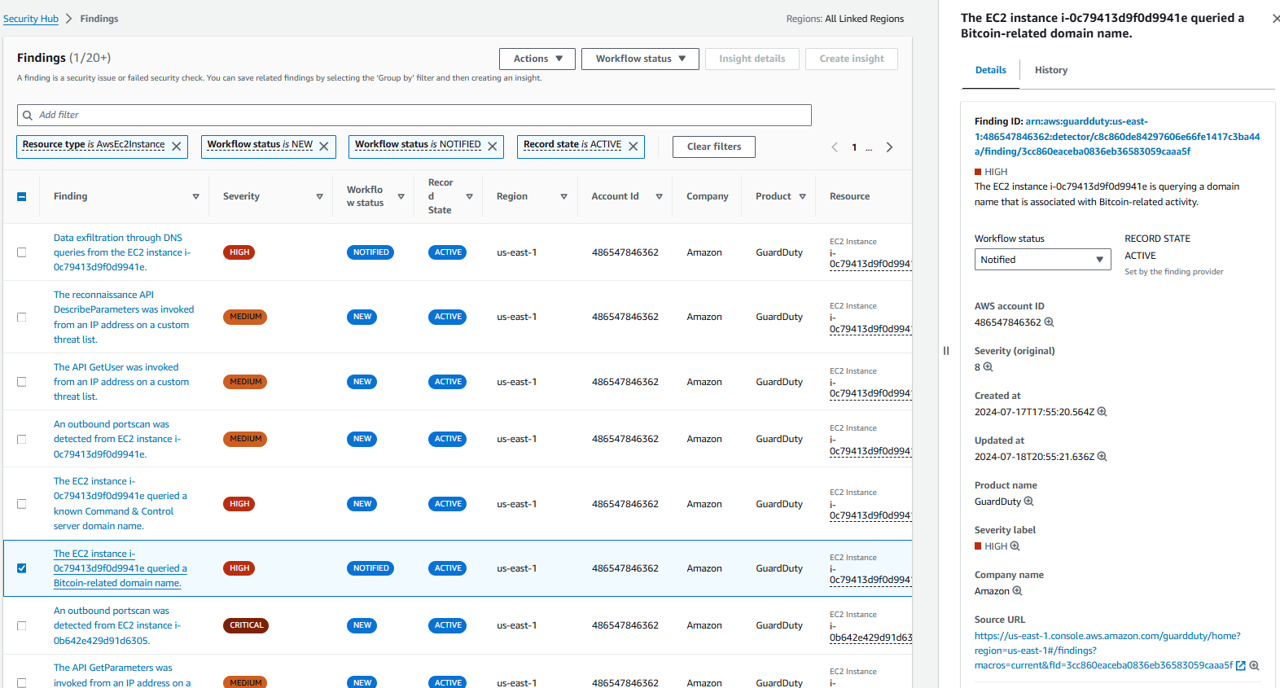
Click the title of any finding in this filtered list where the resource shows the type AwsEc2Instance.
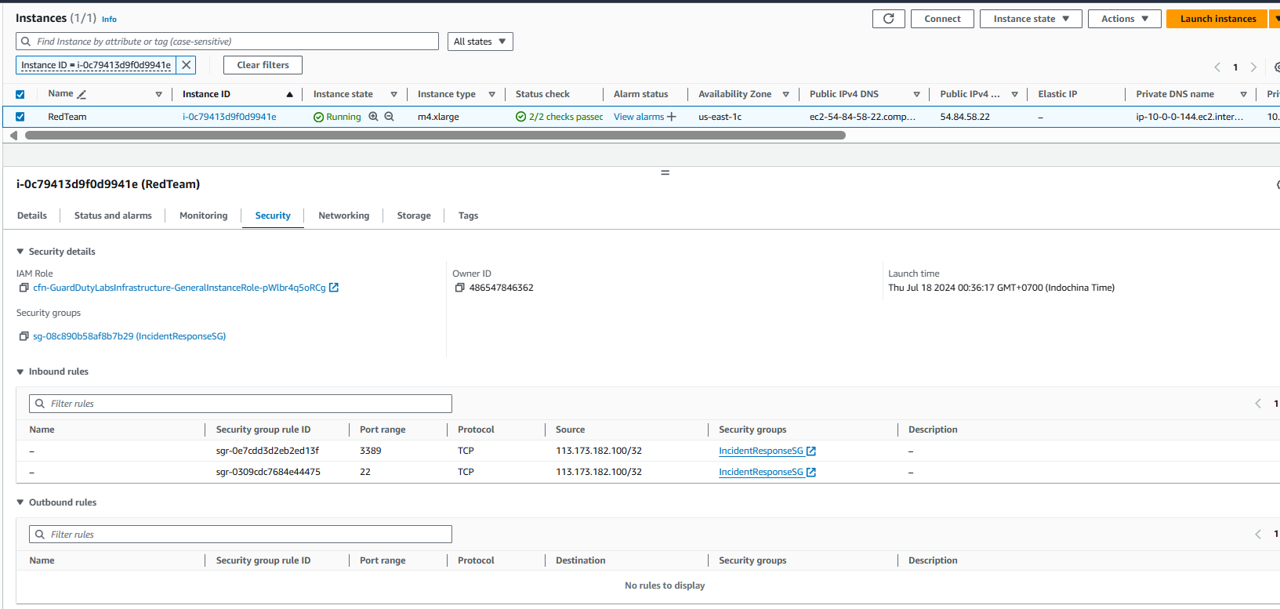
Before we trigger the automation, let’s look at the current configuration the EC2 instance so that we can confirm our automation works. Expand Resources section of the finding.
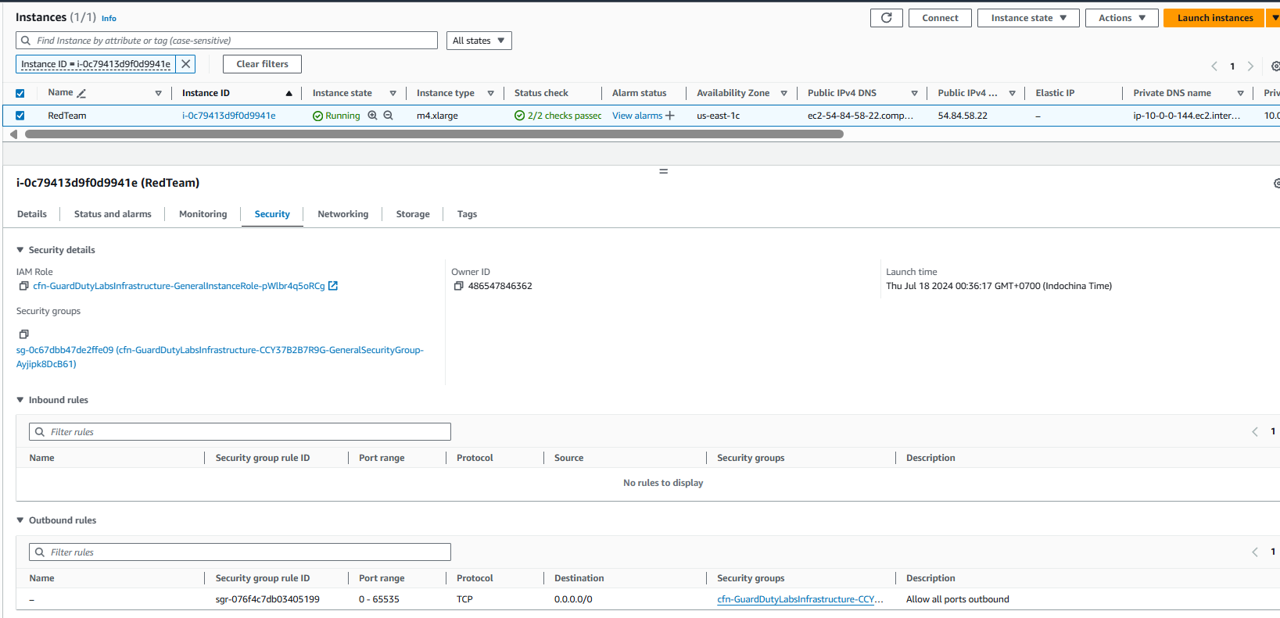
Click the blue link for this EC2 instance, under the heading Resource ID. This will open a new tab showing on the EC2 console showing only this EC2 instance.
Click the instance ID, and then click the Security tab. Take note of the name of the security group.
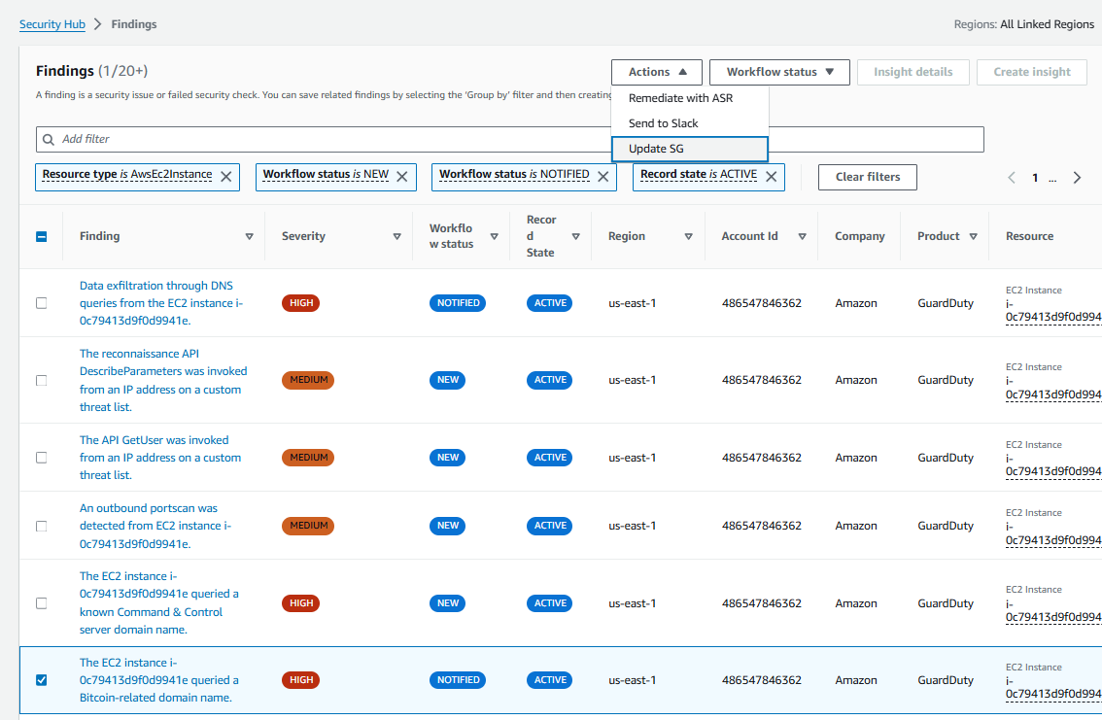
Go back to the Security Hub tab in your browser (don’t close out of the EC2 tab, you will need to return here) and click in the check box on the left side of this same finding.
In the Actions drop down choose the name of your custom action, Update SG.
After seeing the banner display “Successfully started action…” go back to the EC2 browser tab. Refresh the tab (usually after 3 minutes). Verify that the security group on the instance has been changed.