Inspector - Suppressing findings
Use suppression rules to exclude findings that match criteria. For example, you can create a rule that suppresses all findings with low vulnerability scores, so you can focus only on findings that are most critical.
Suppression rules are only used to filter your list of findings and don’t have any impact on findings or prevent Amazon Inspector from generating findings.
If Amazon Inspector generates findings that matches a suppression rule, the findings are set to Suppressed. Findings that match a suppression rule don’t appear in your list by default.
Amazon Inspector stores suppressed findings until they’re remediated. Amazon Inspector detects remediated findings. When Amazon Inspector detects a remediated finding, it sets the finding to Closed and stores it for 7 days.
Suppressed findings are published to AWS Security Hub and Amazon EventBridge as events. You can automatically suppress unwanted findings in Security Hub by changing the status of the findings using an EventBridge rule.
You can’t create a suppression rule that closes or remediates findings. You can only create a suppression rule to filter which findings appear in your list. You can view suppressed findings at any time in the Amazon Inspector console.
Member accounts in an organization can’t create or manage suppression rules.
Configure a rule to suppress low vulnerability findings in dev
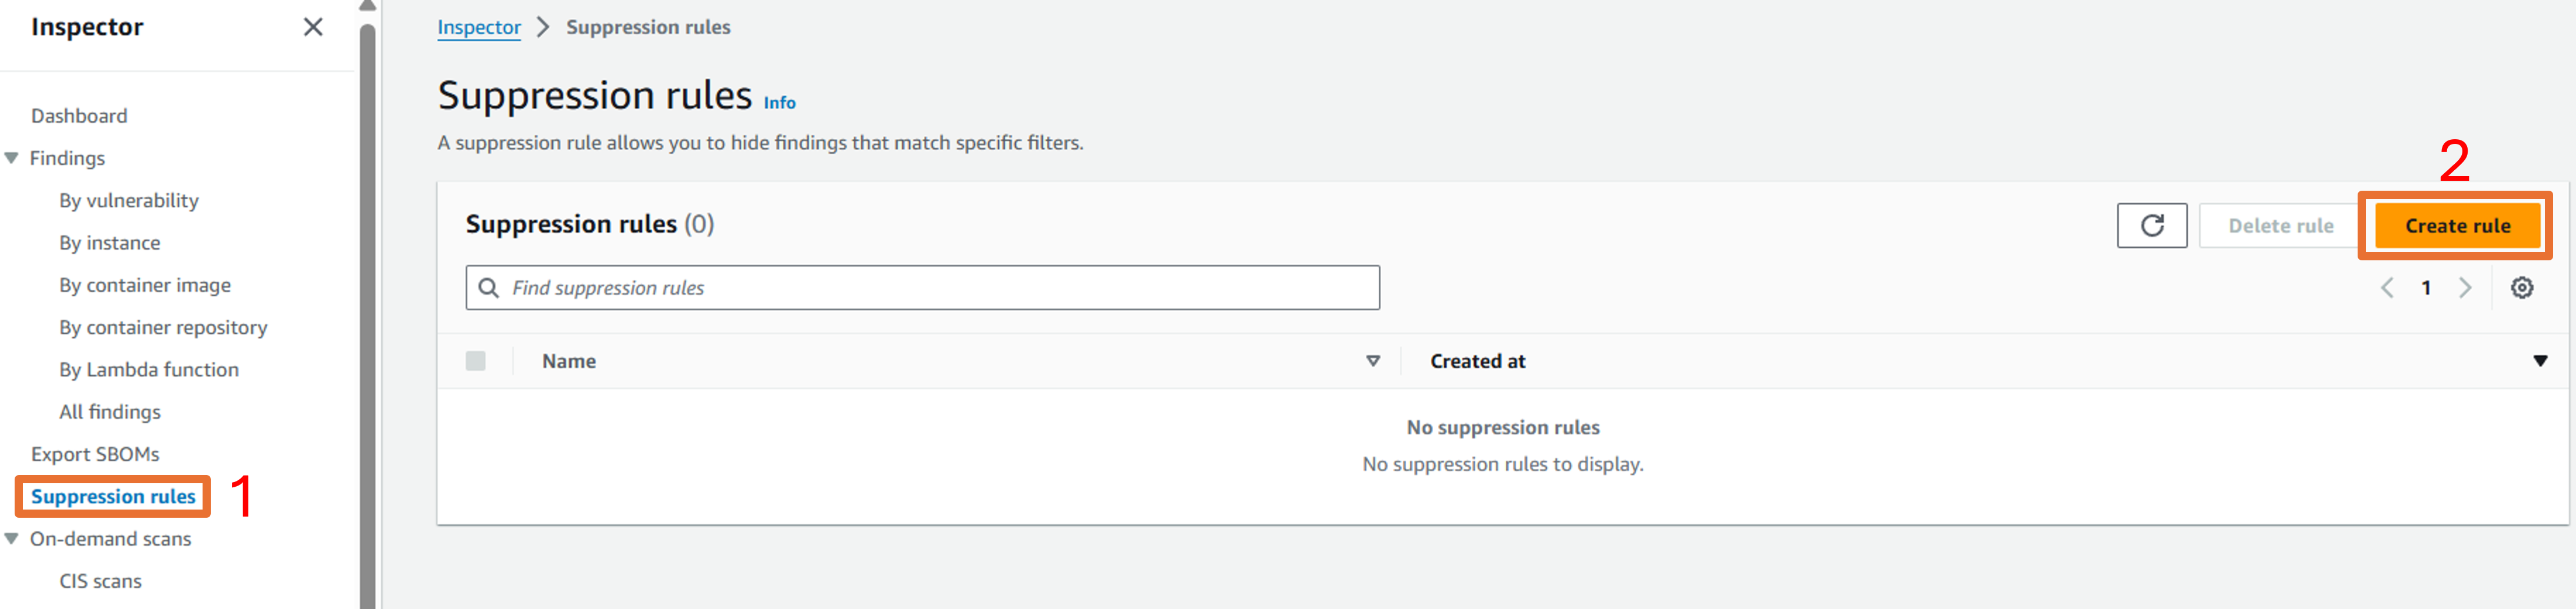
Click on Suppression rules from the navigation on the left in Inspector.
Click on Create Rule.
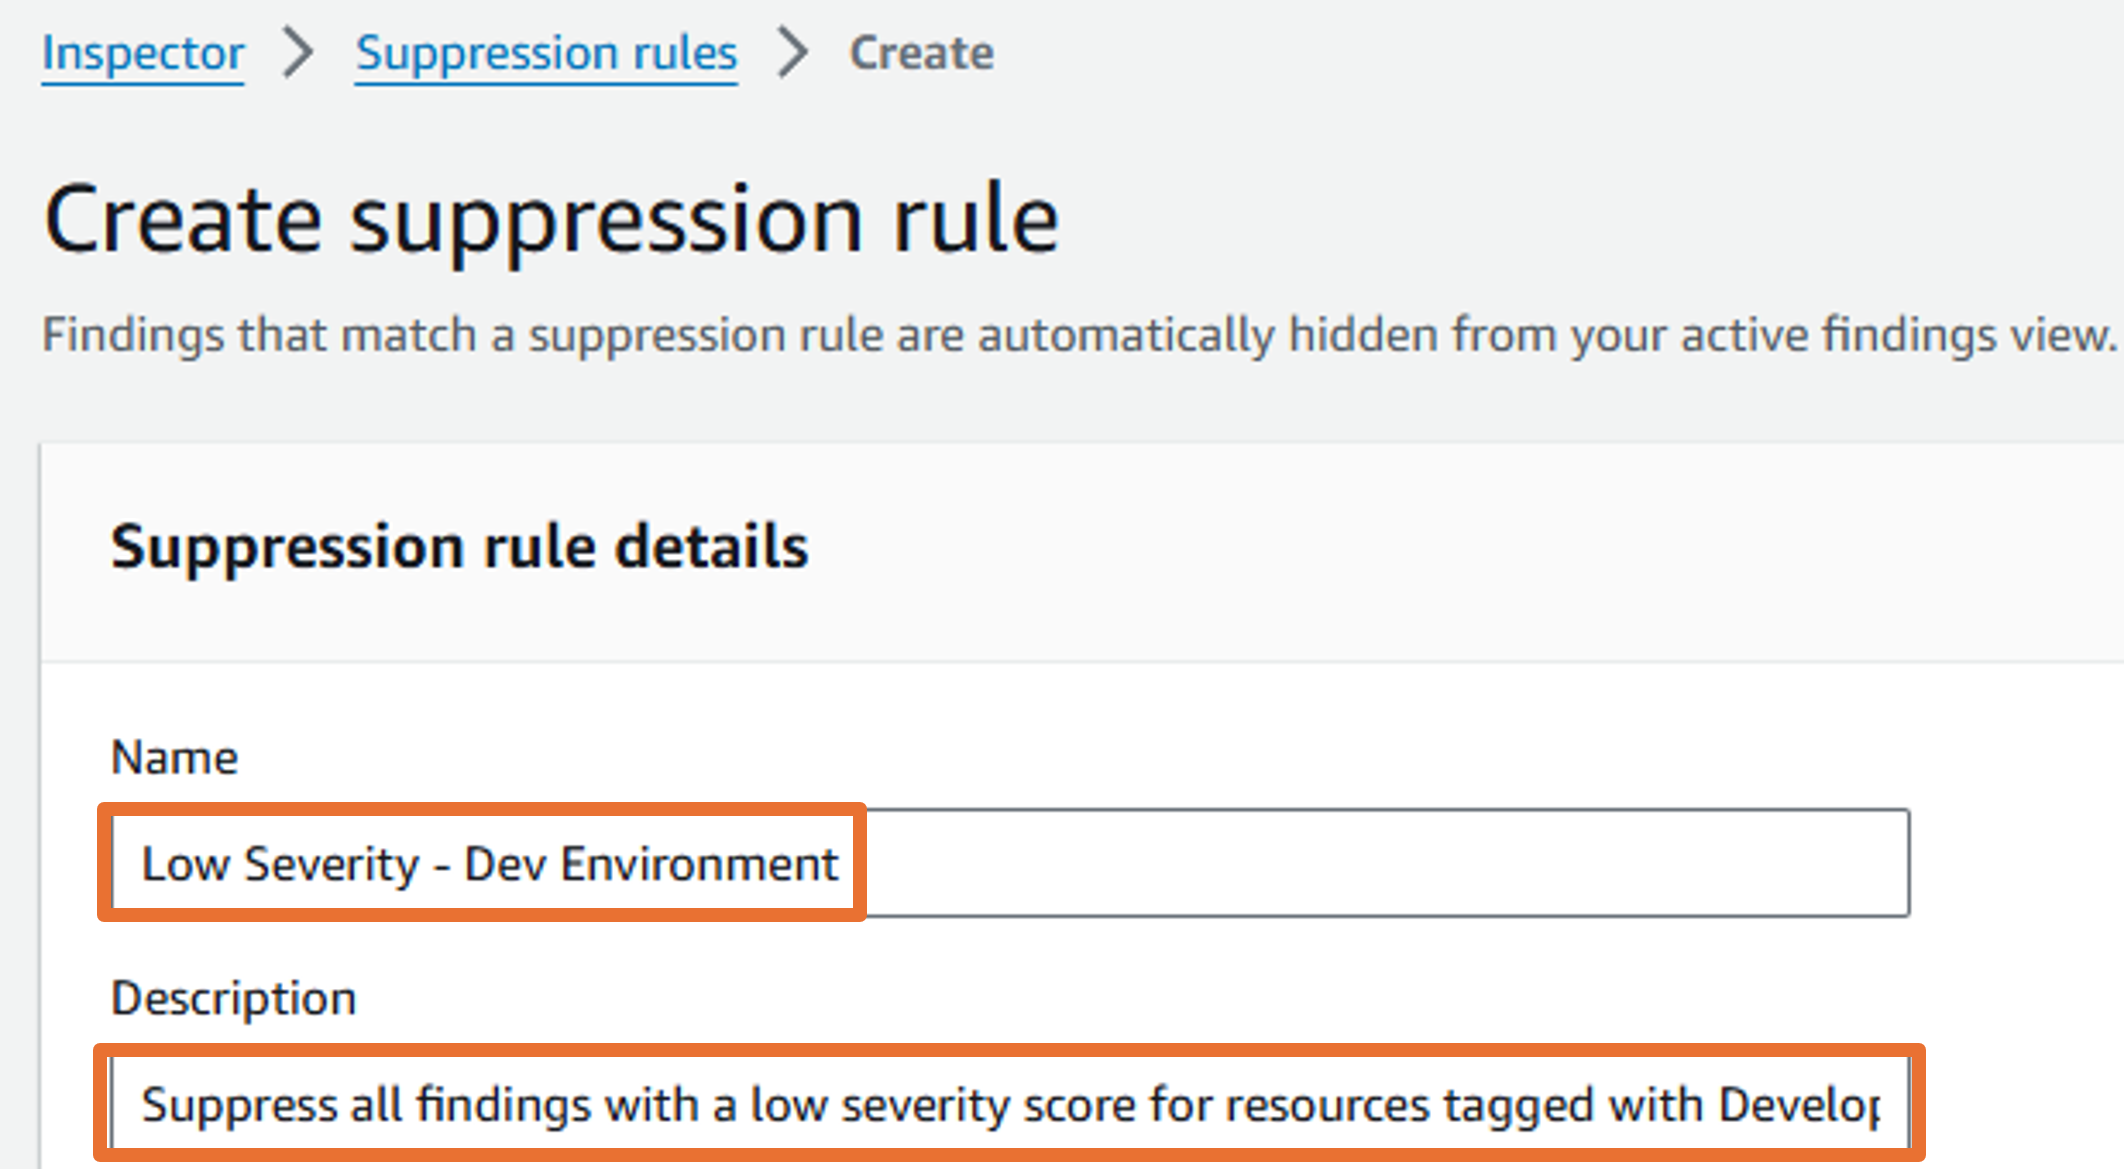
Enter “Low Severity - Dev Environment” in the Name field.
Enter “Suppress all findings with a low severity score for resources tagged with Development” in the Description field.
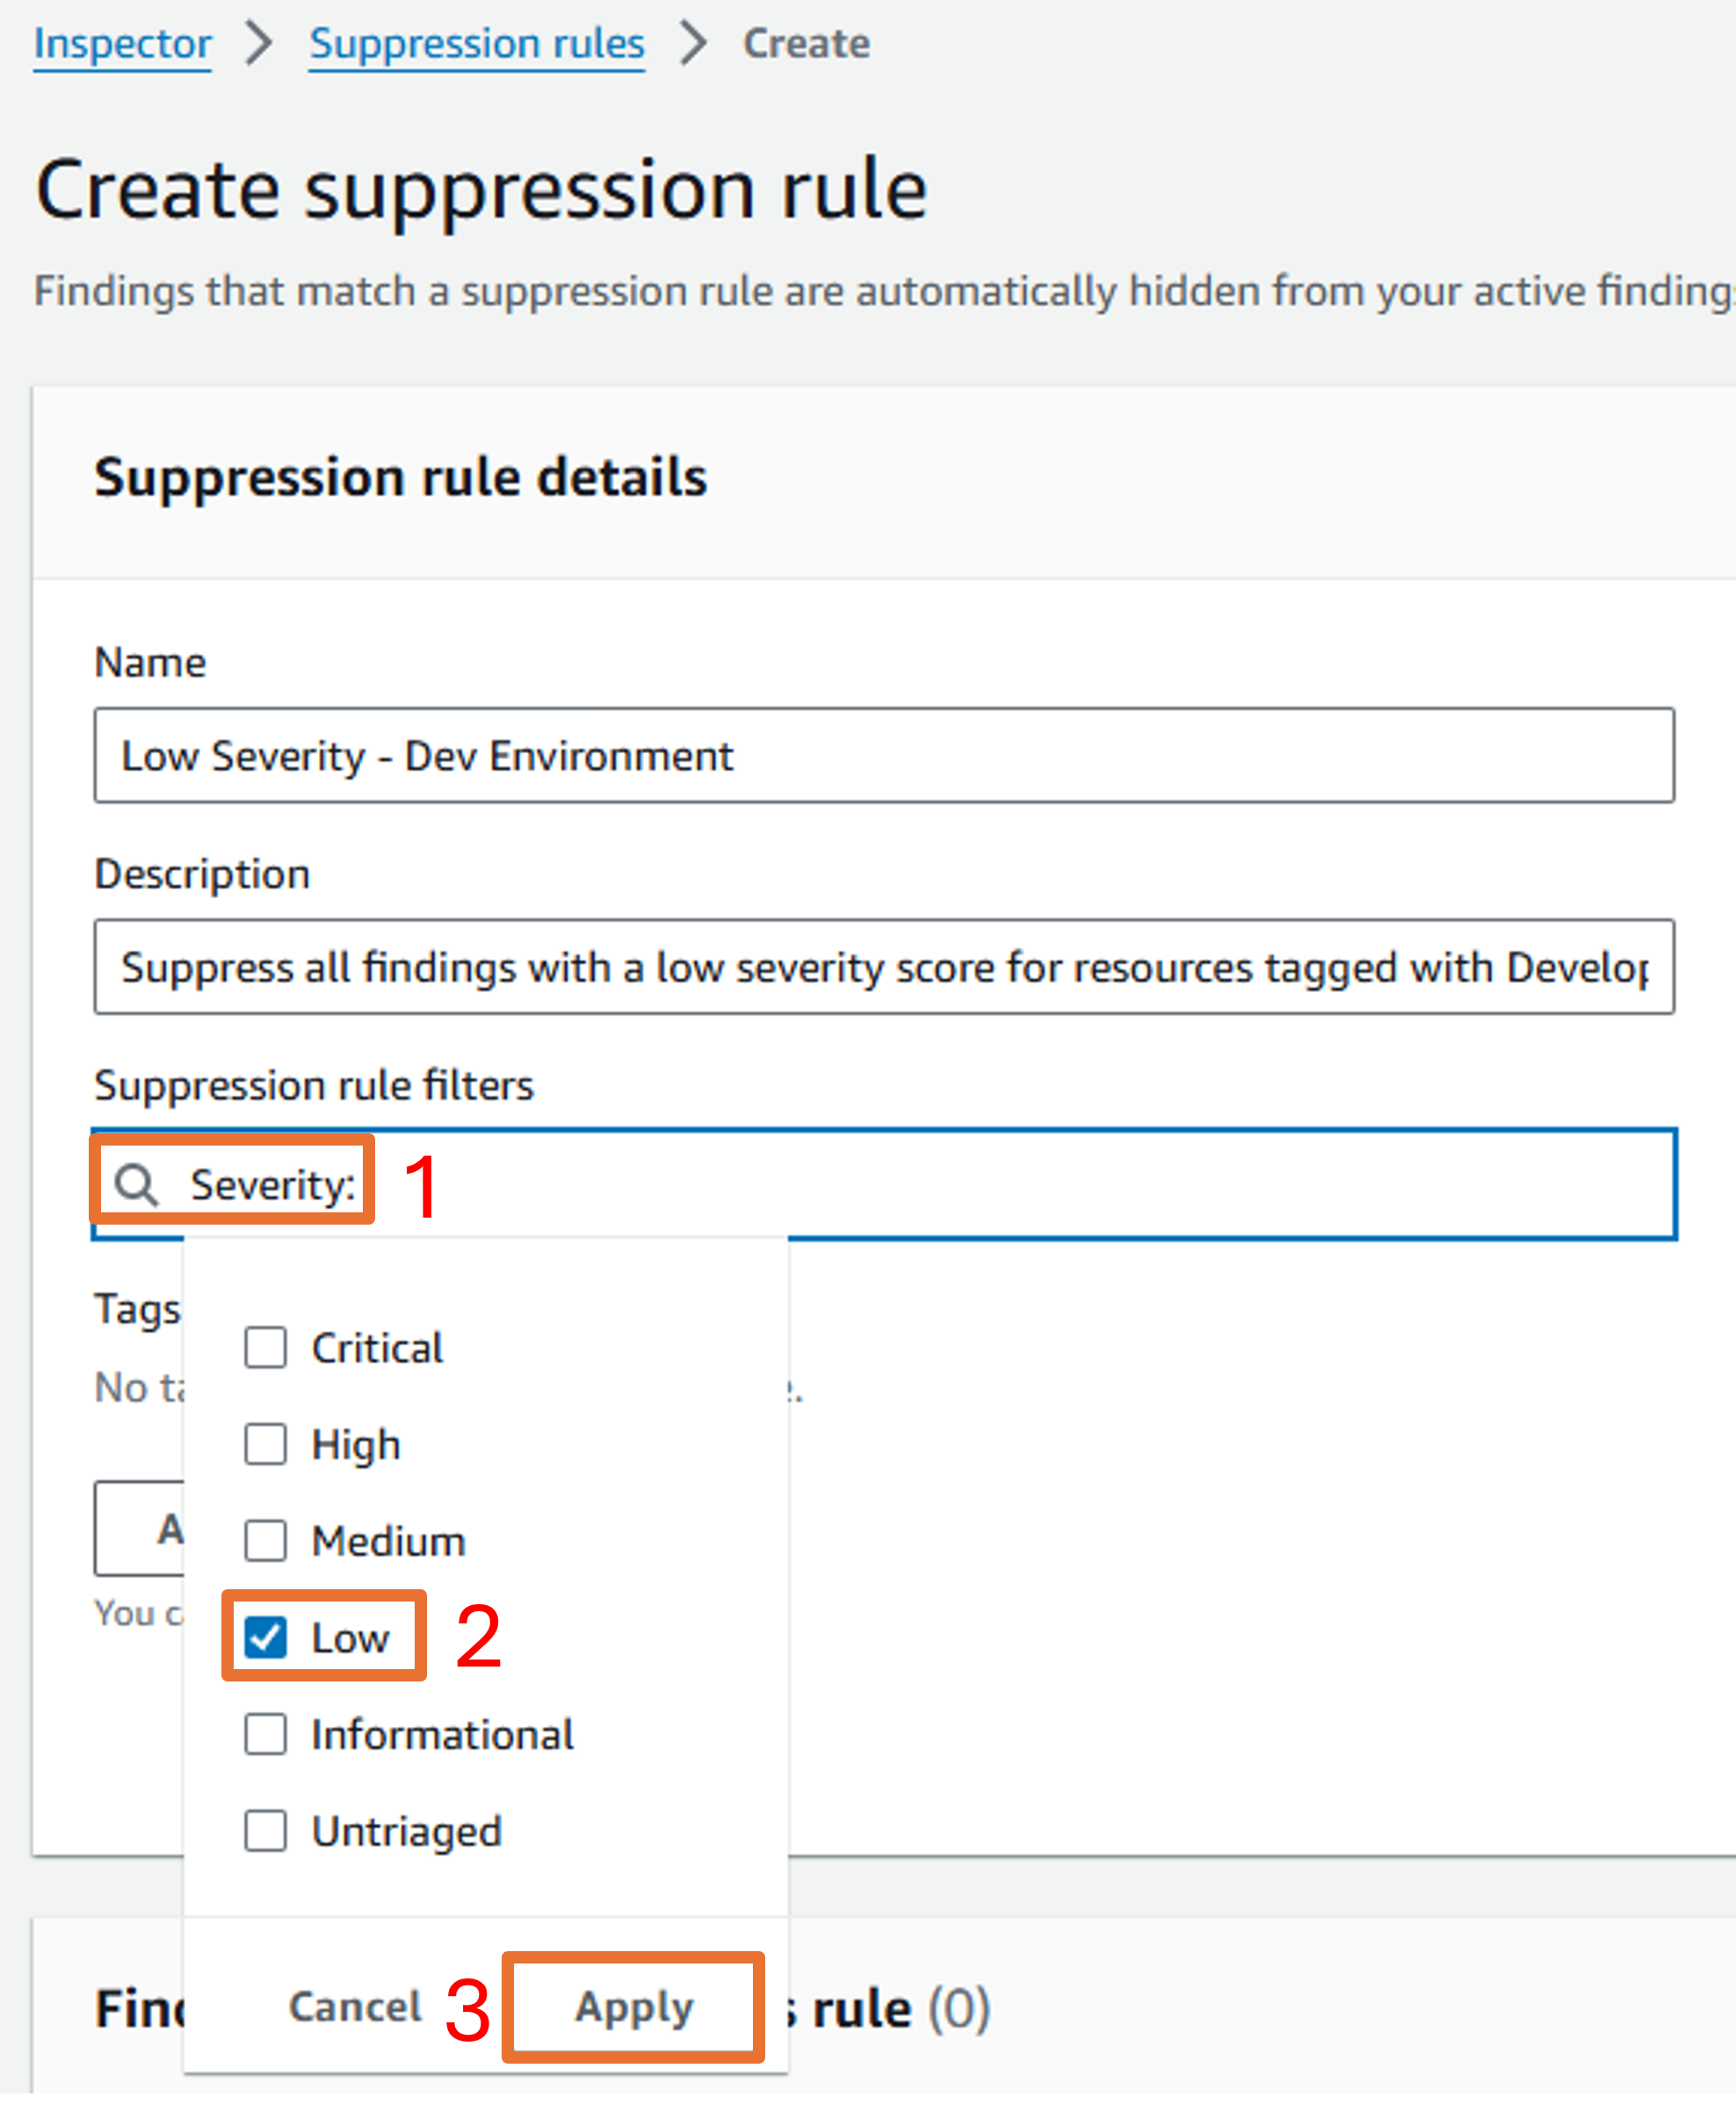
Under Suppression rule filters select Severity and check the box for Low. Click Apply.
Then click to add another filter and select Resource tag under EC2. Input “Environment” for the key and “Development” for the value. Click Apply.
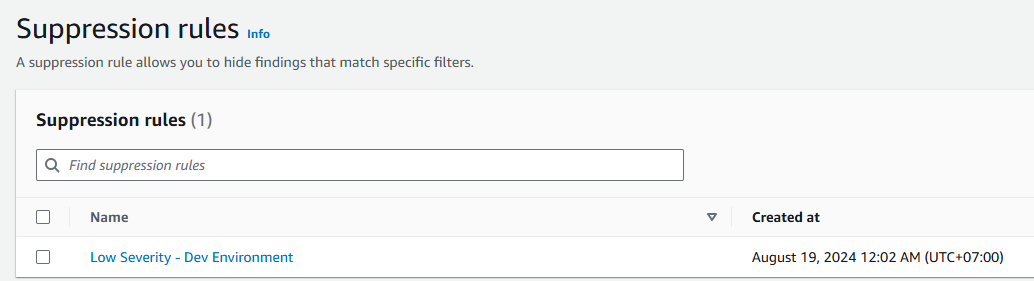
Click Save. Result:
You can view suppressed findings in the All Findings page by switching from Active to Suppressed in the dropdown.