GuardDuty - Building your own threat list
Implementing a threat list with a fictitious address
Navigate to Amazon S3 in the AWS console.
Find the bucket with “-threatlistbucket-” in the name and click on the name.
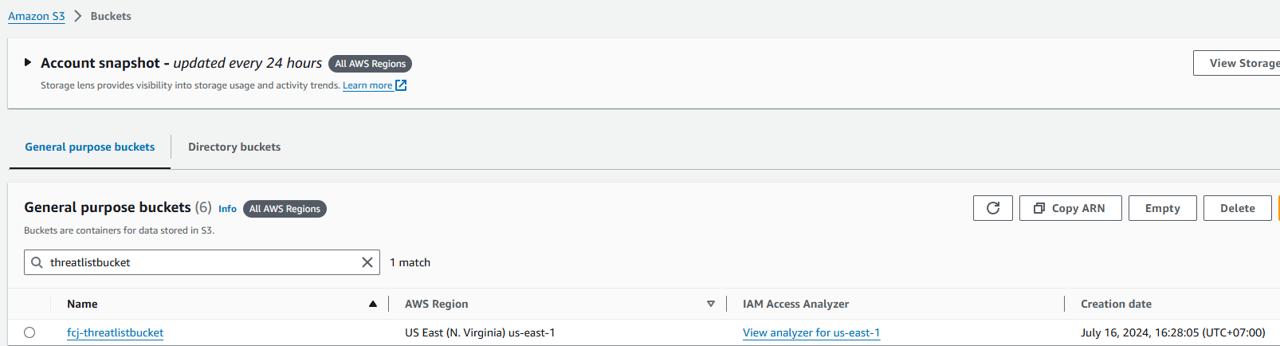
Here is the bucket that the AWS Workshop account has setup
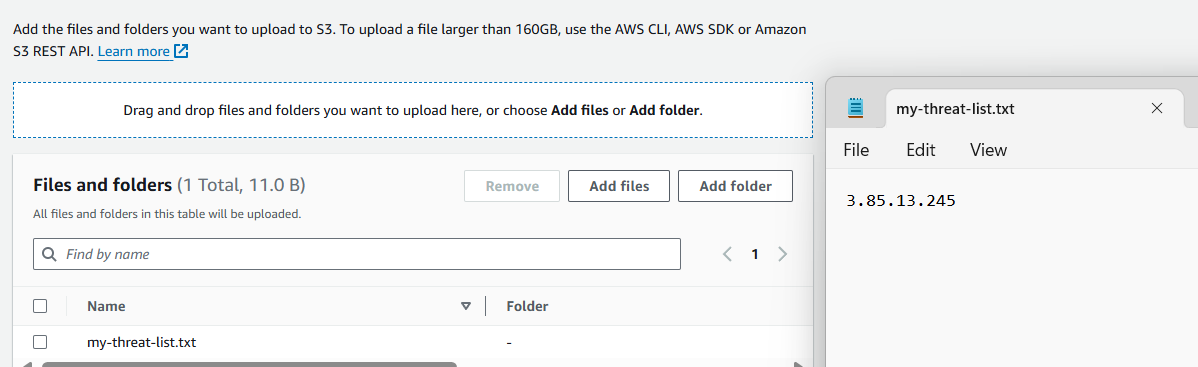
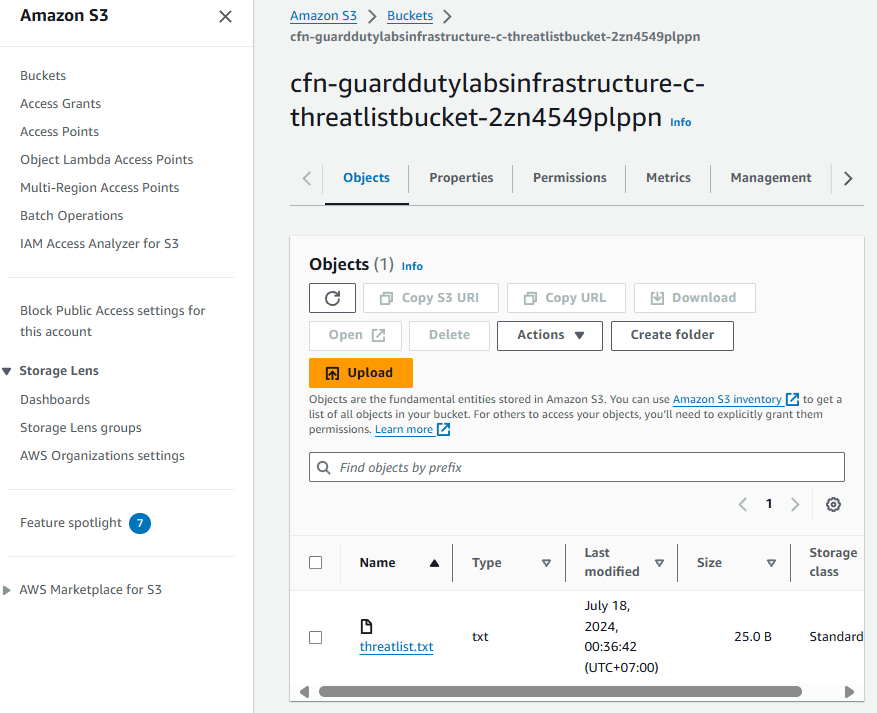 3. Upload the threat list you created above to the S3 bucket.
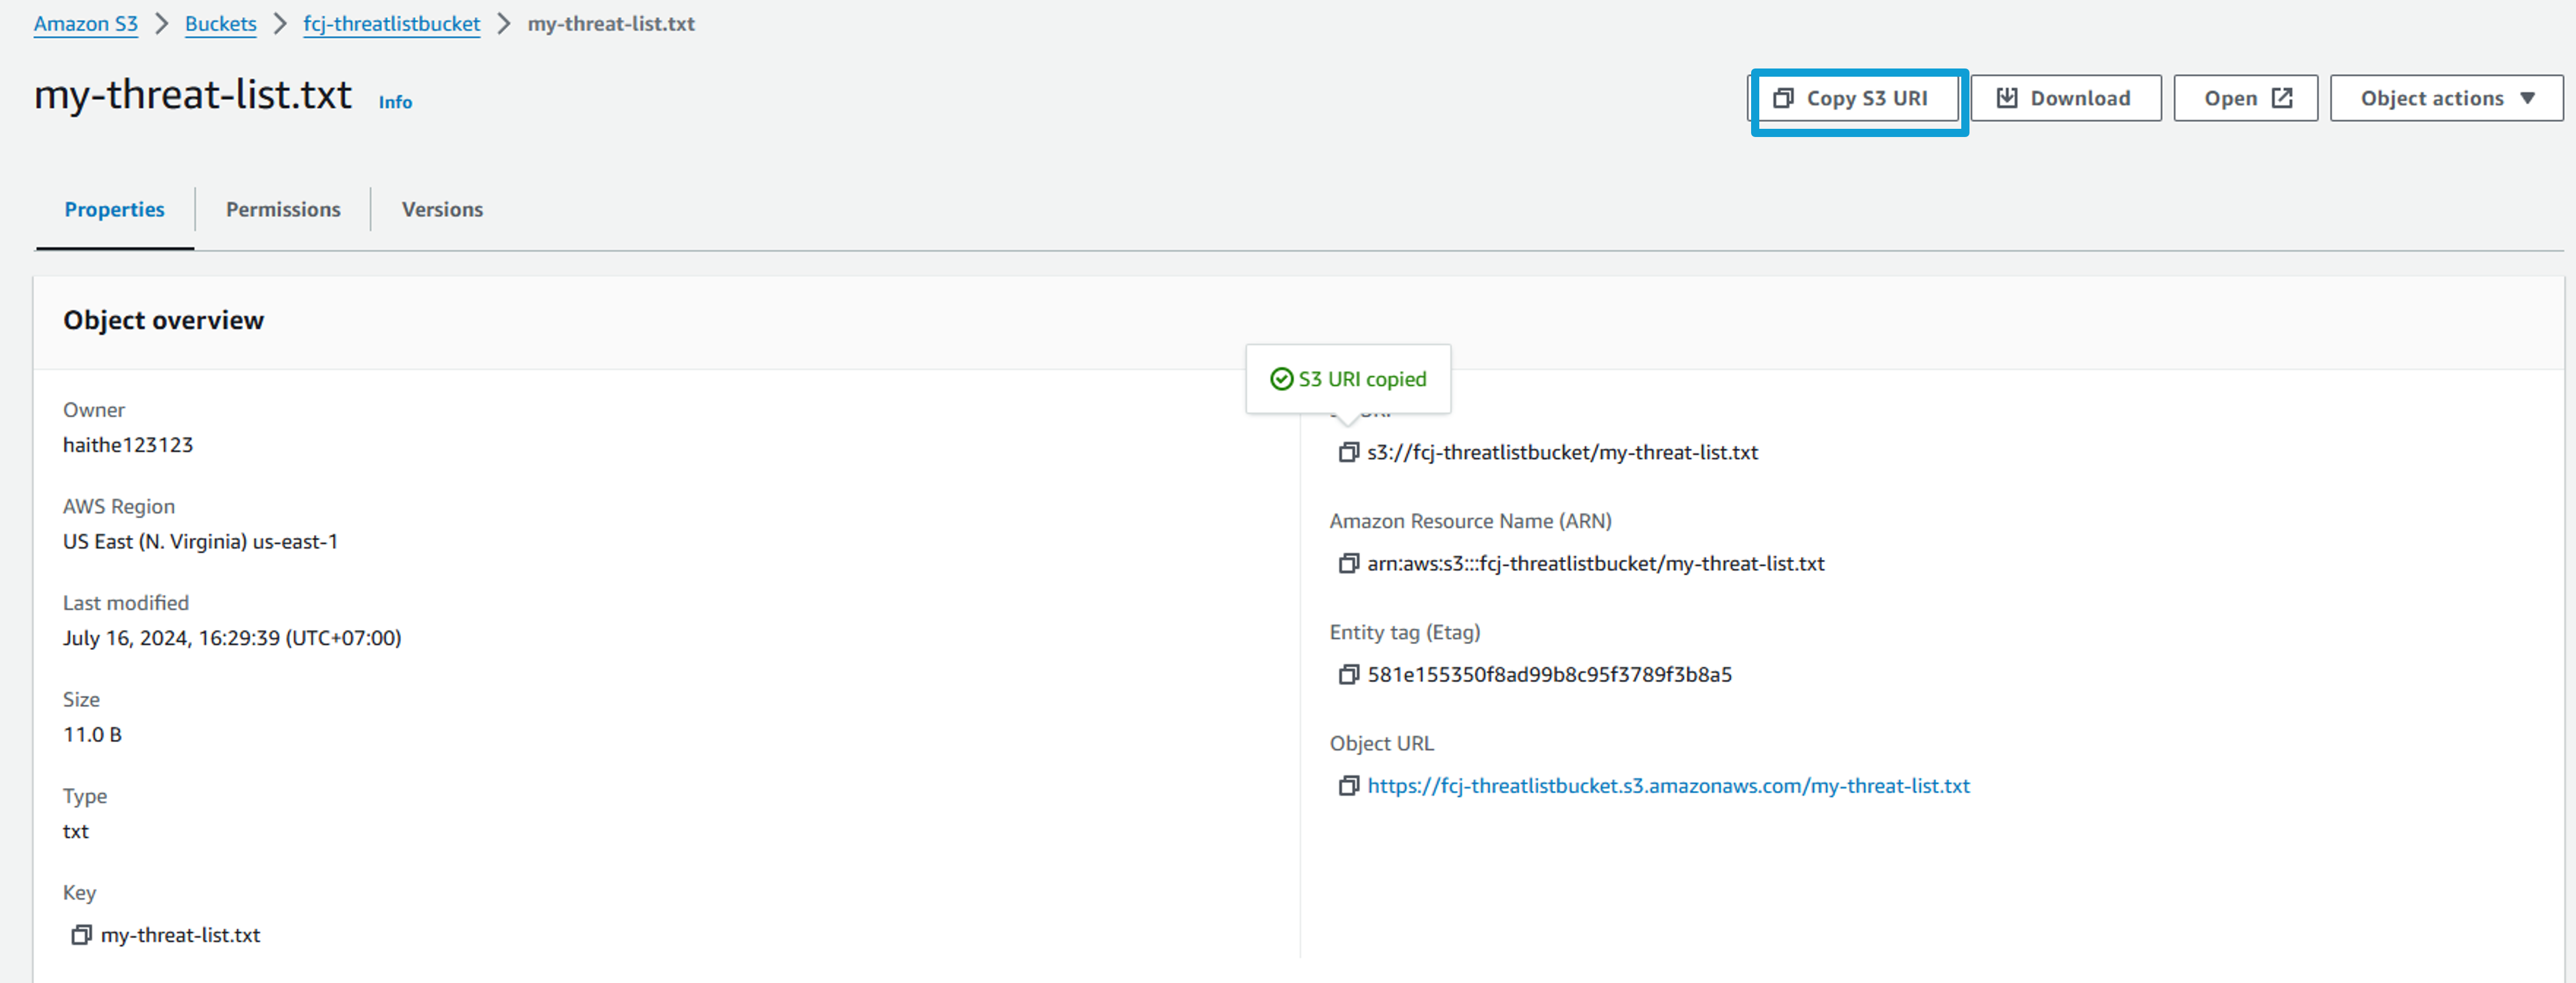
Record the S3 URI of the file you have just uploaded. To find the URI, open the bucket, click to open the file, and copy the S3 URI.
Now we will add the list your uploaded to the S3 bucket to the Threat lists in GuardDuty. Return to Amazon GuardDuty.
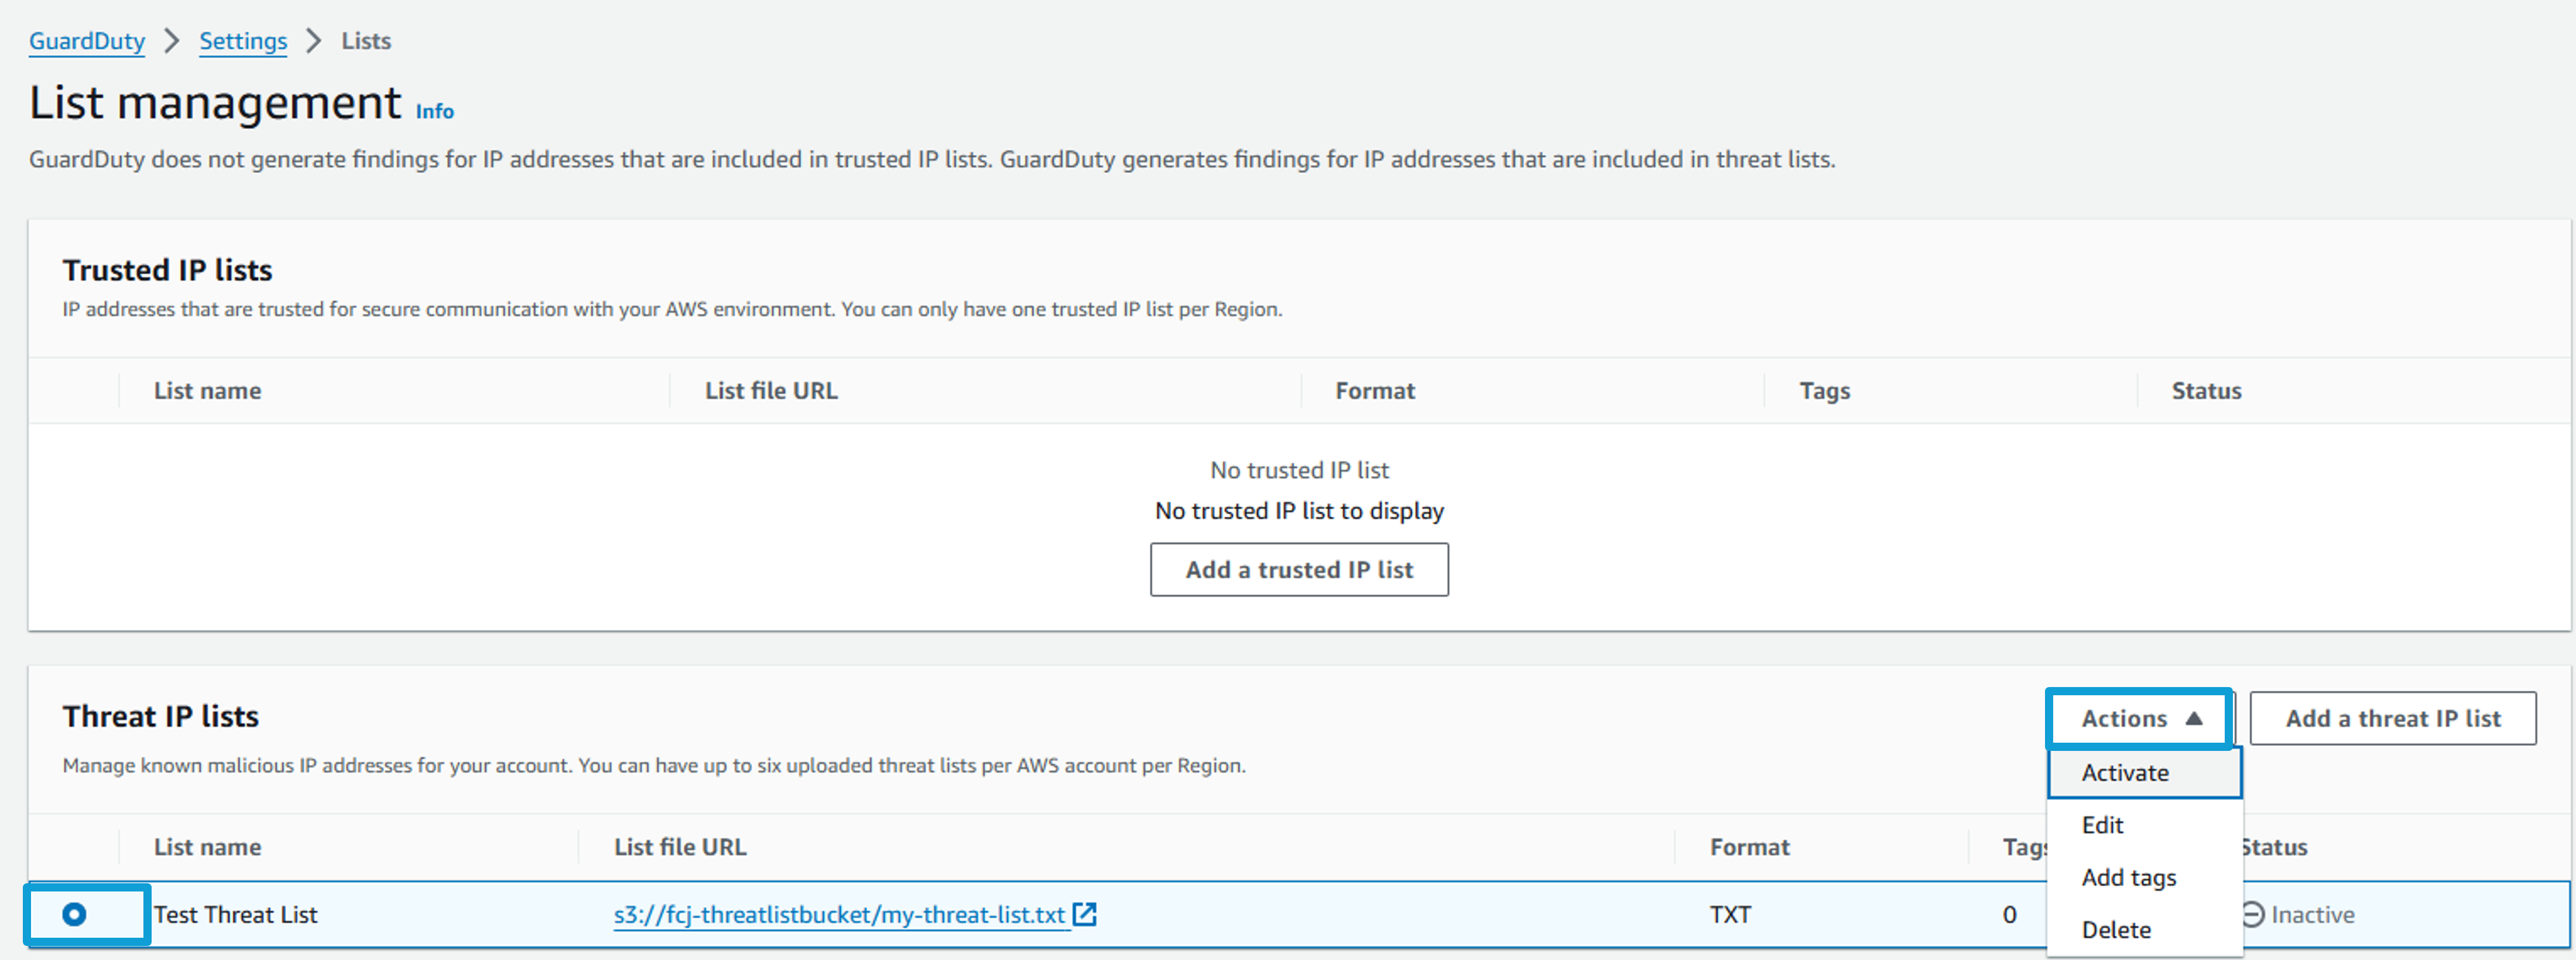
In the left navigation of GuardDuty, select Lists.
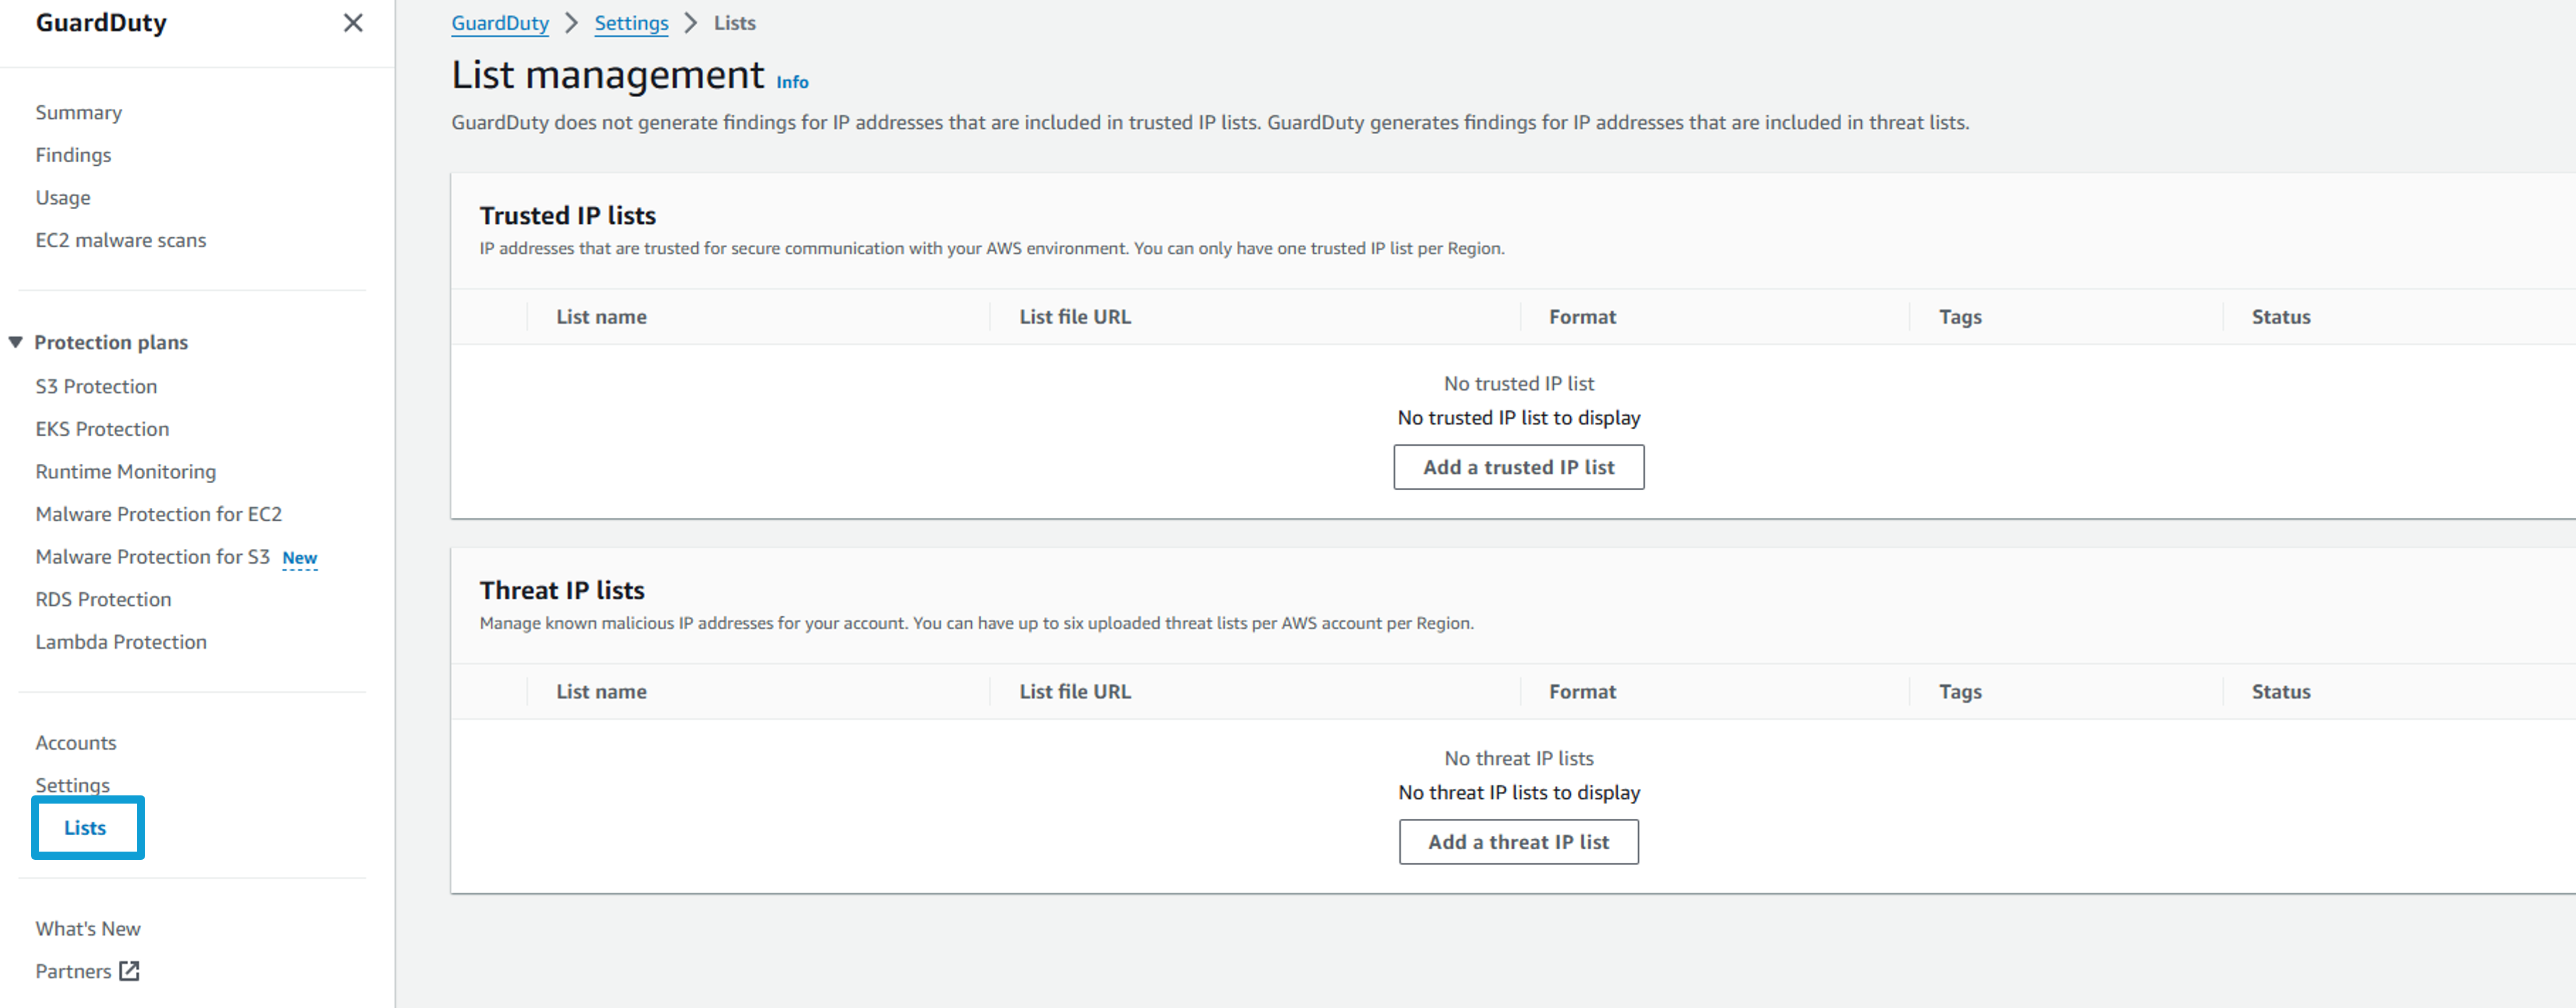
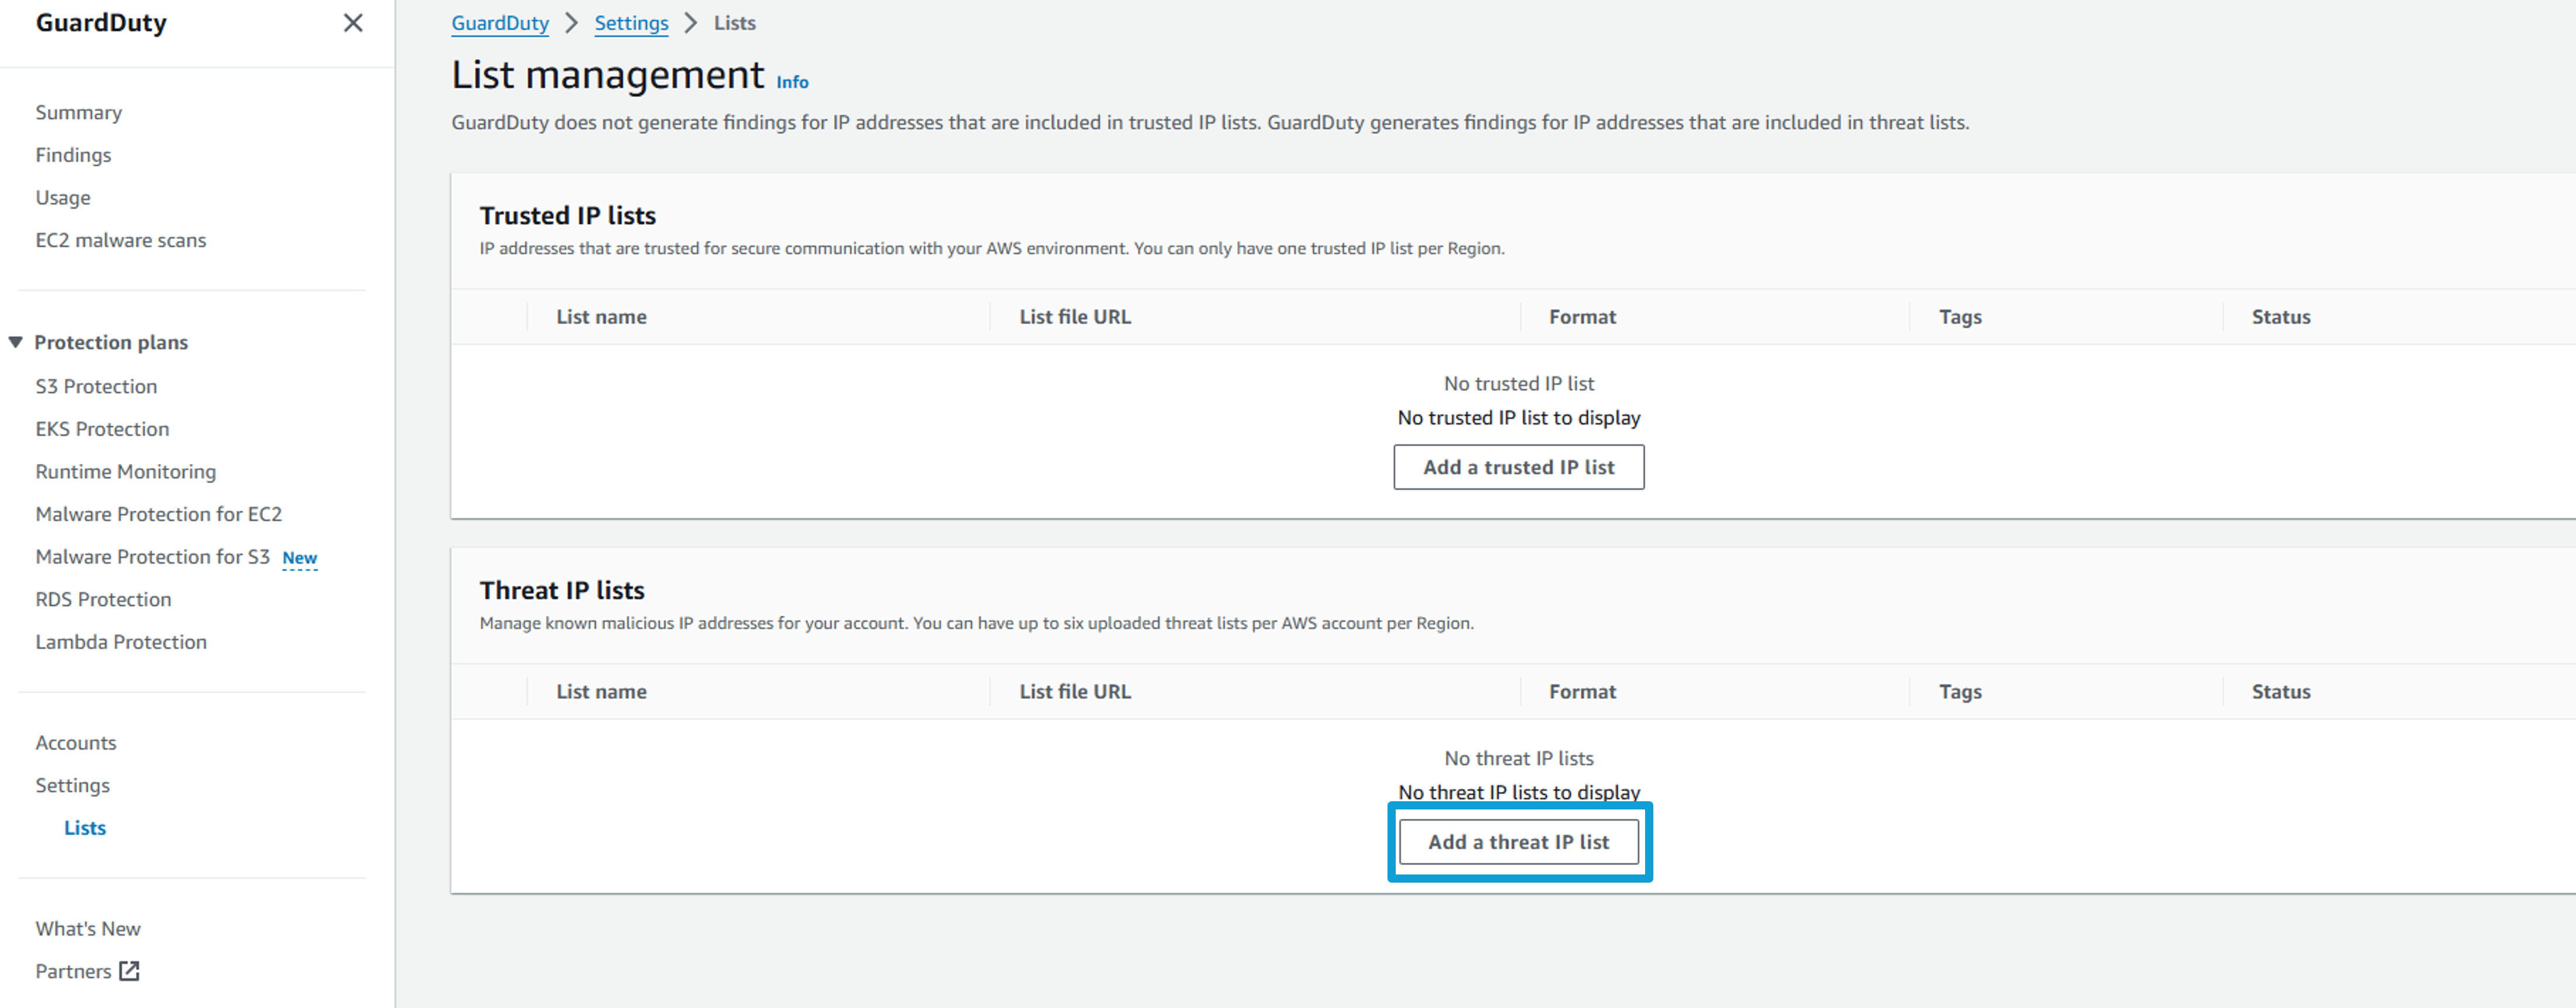
Click the button Add a threat IP list.
In the List name box, give your list a friendly name like “Test Threat List”.
Under location type the S3 URI for the uploaded file that you recorded earlier.
Select Plaintext as the Format.
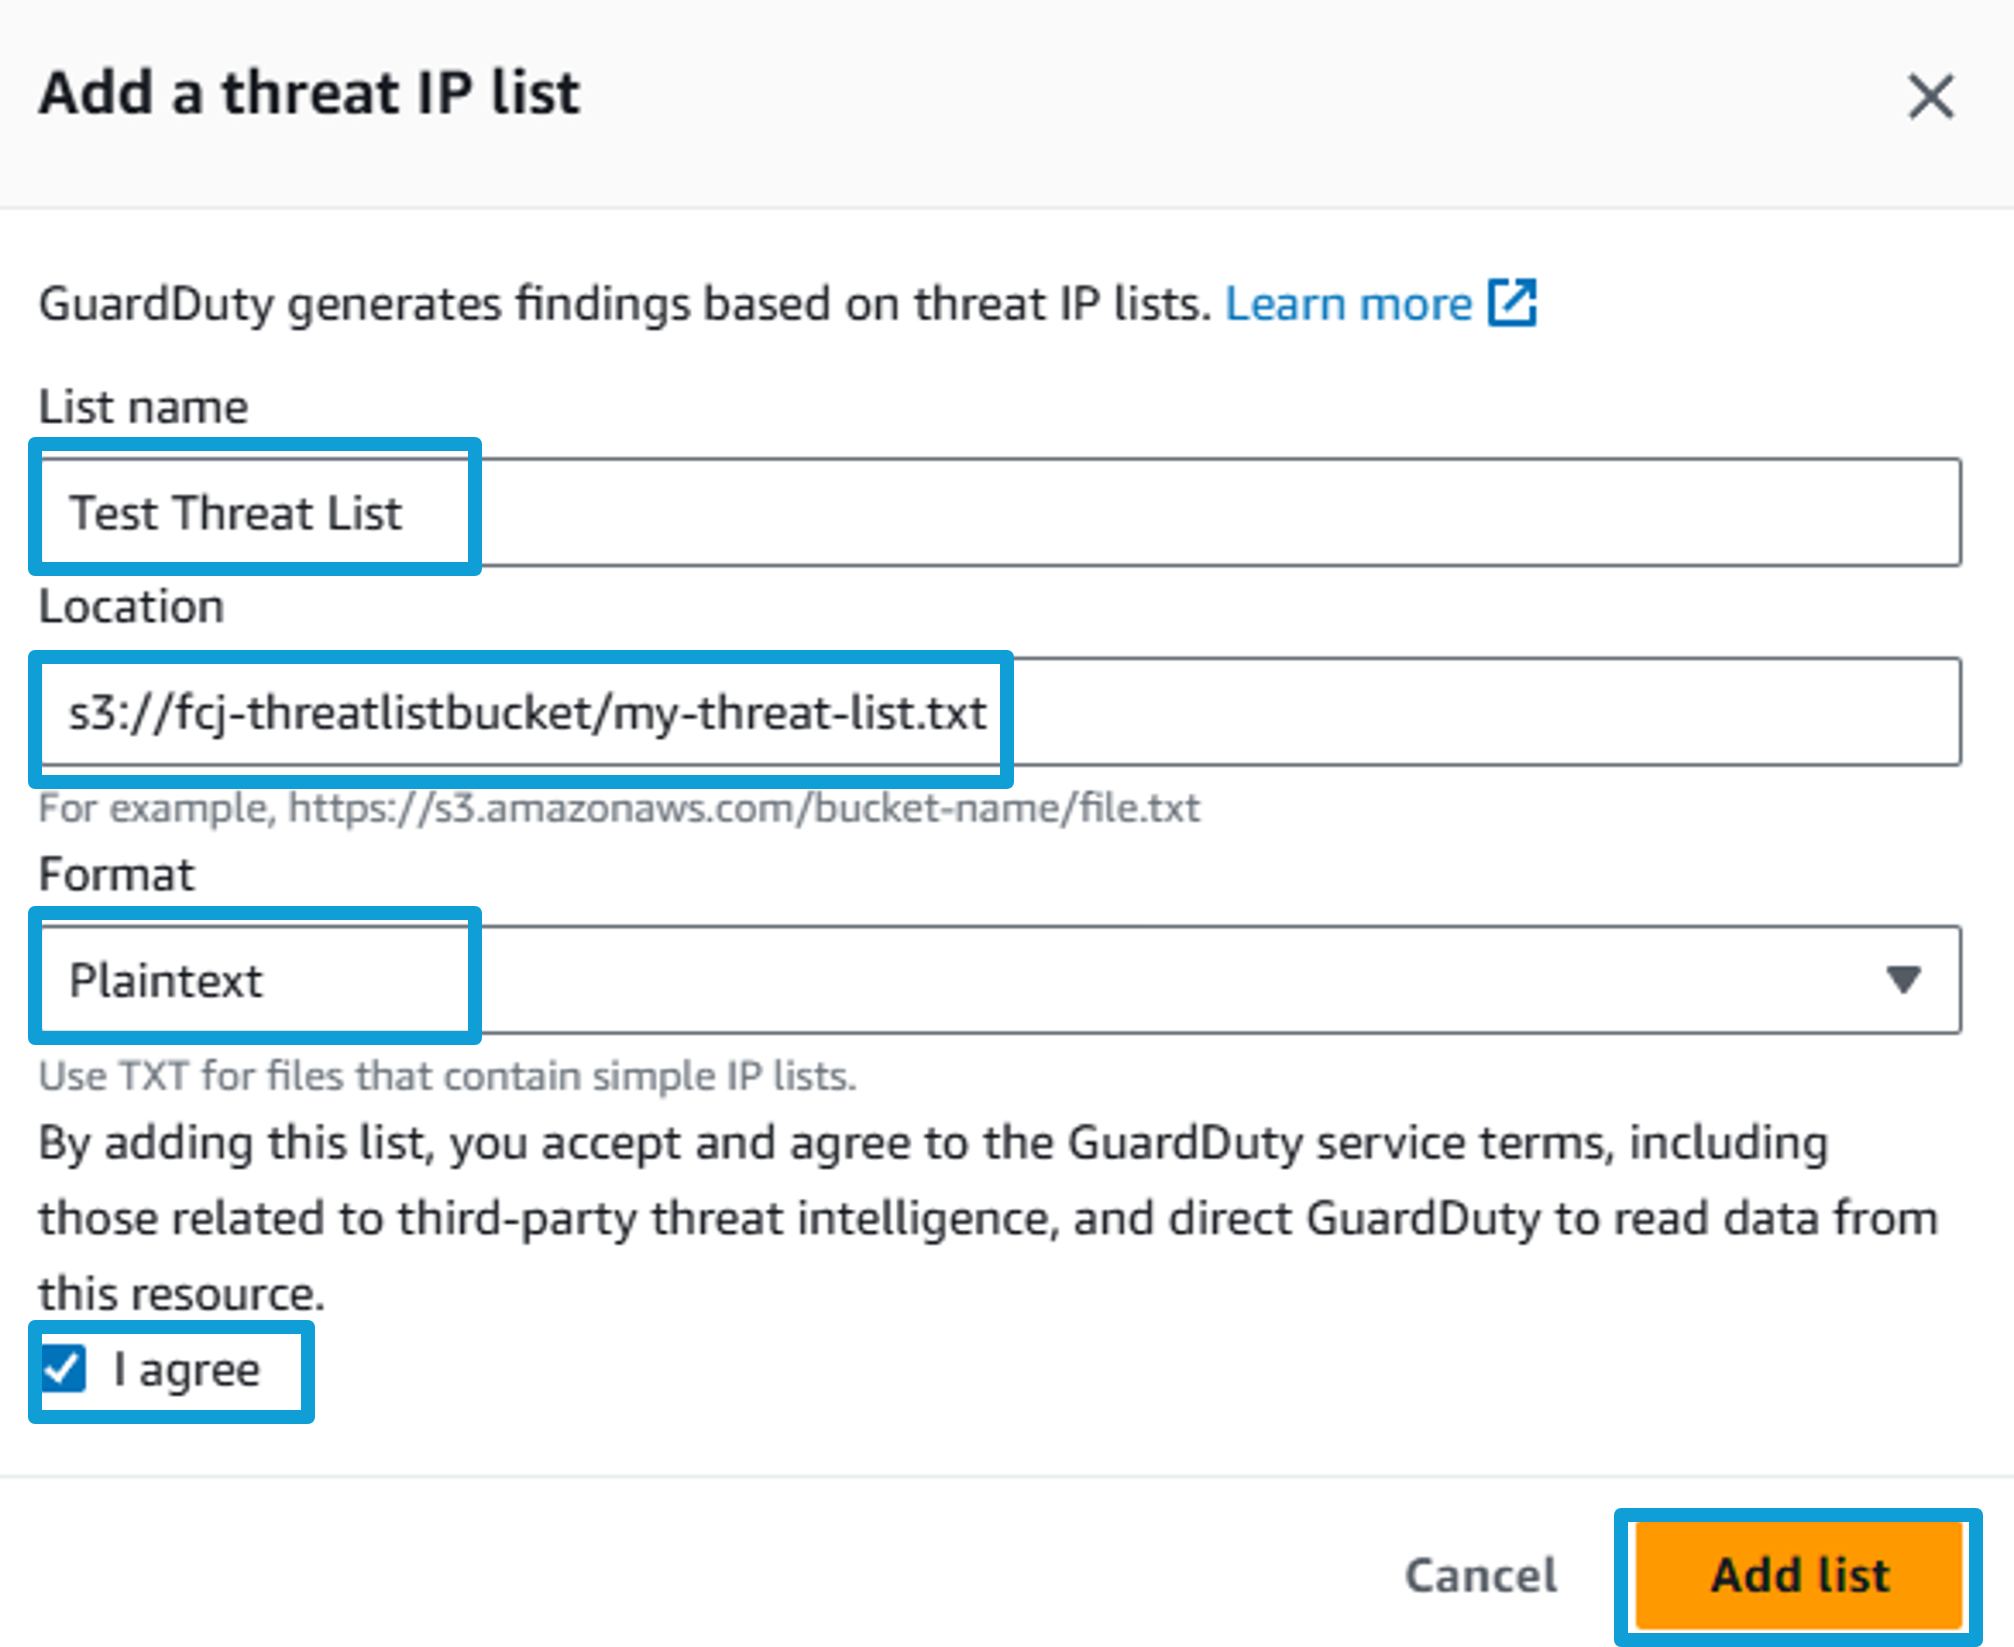
Click I Agree and then click Add list
You will need to activate the list once it has been added to GuardDuty. Select the newly added list. Click Actions, and then select Activate.
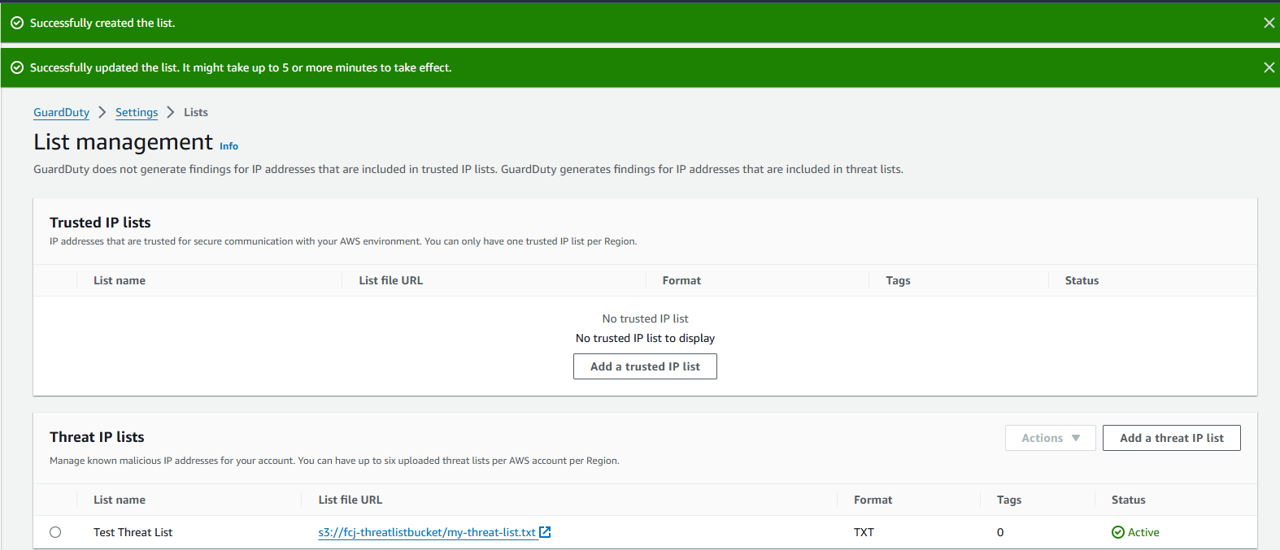
A green status banner will appear saying “Successfully updated the list…”.